How can I personalize my videos?
Feature: This feature will provide personalization as well as the stitching of Videos.
Who will be using this?
This will be used by Admin/Marketing Users to create the Video templates and share it with Partner/Sales Users. The Partner/Sales Users can personalize the video and send it to their contacts.
Benefits:
Personalized videos are a powerful way to capture and keep your audience's attention. In this the sender’s details can be personalized giving a personal touch and adding the prospect’s details like name, Company name is the perfect way to engage and delight the audience.
Process:
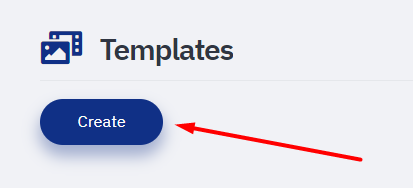
Step 1: In ‘Setup > Asset Management > Templates, there will be a type called “Personalized Video”


.
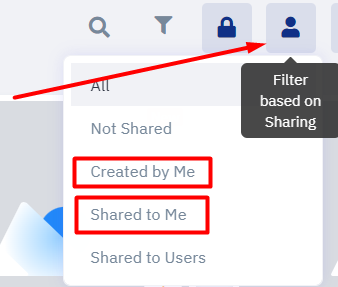
When the folder is loaded, it will display all the video templates created/shared with the User and will have all the grid like any other template i.e. All, Created by Me, Shared to Me, Shared to Users.
In the Folder, the User can create new templates and it will ask for an ‘Input’ based template, by default this will be “No”.

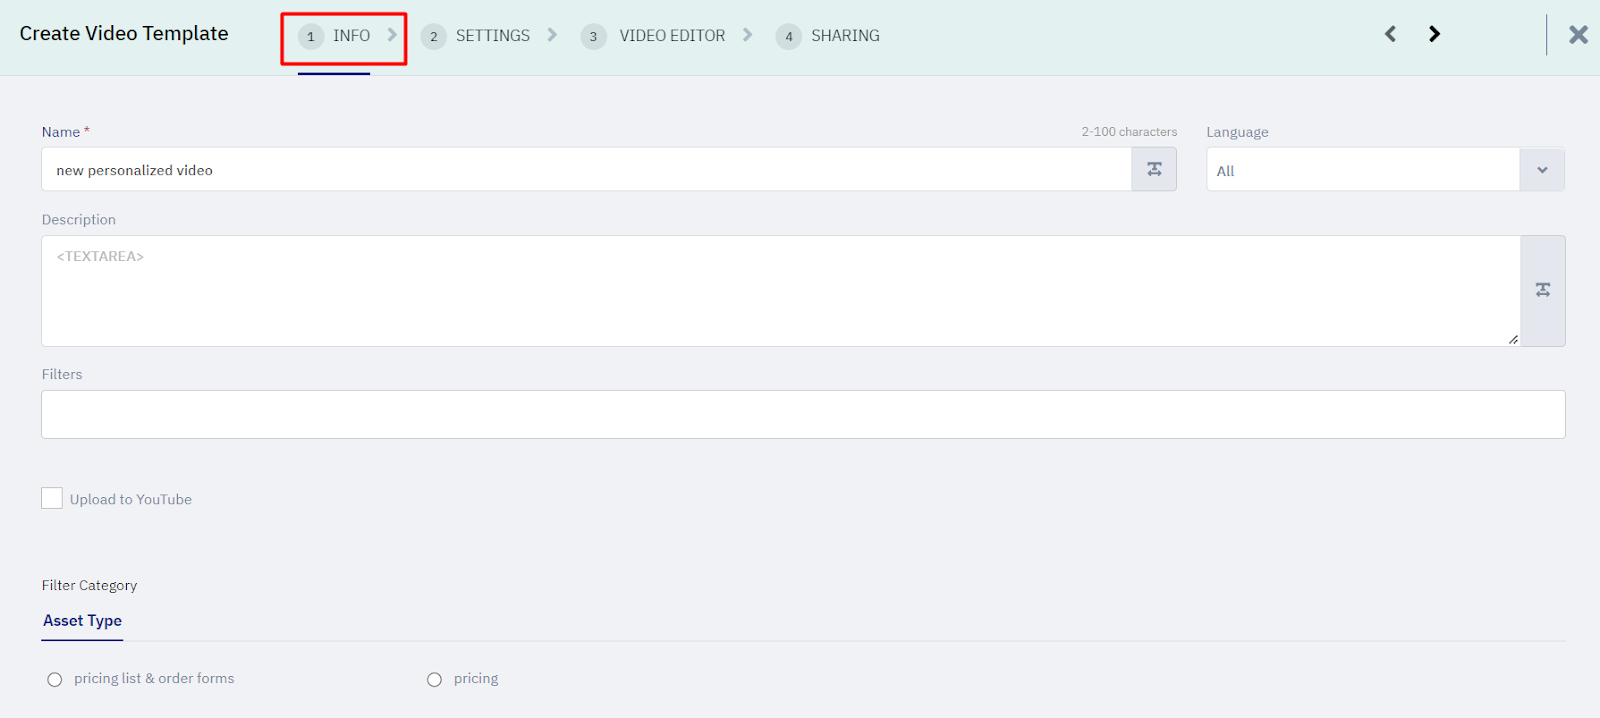
On “Go”, it will open the step process with the first step of “Info” with the default name as ‘new personalized video’.
Step 2: Settings
In this step, the User will pick a thumbnail for the video, by clicking the upload a thumbnail icon and can select any appropriate thumbnail for the video.

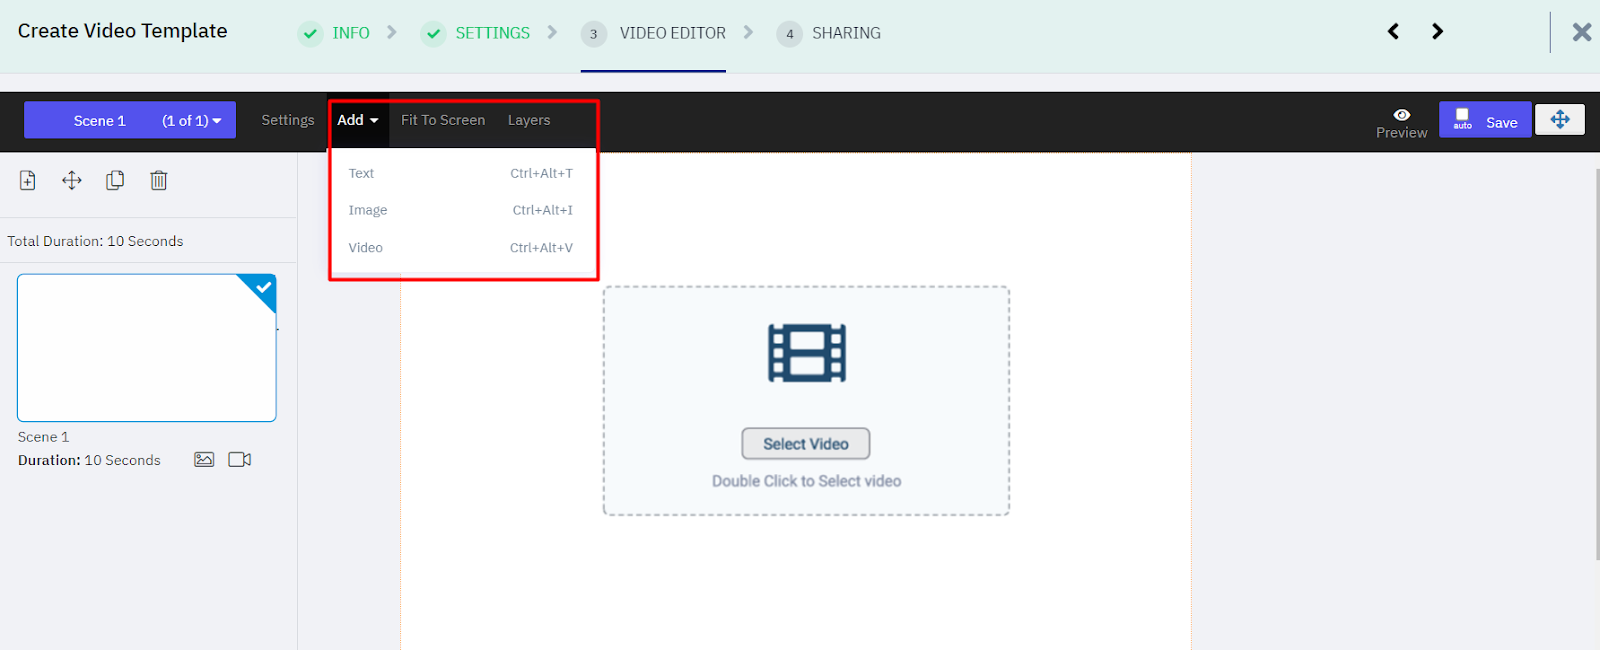
Step 3: Video Editor
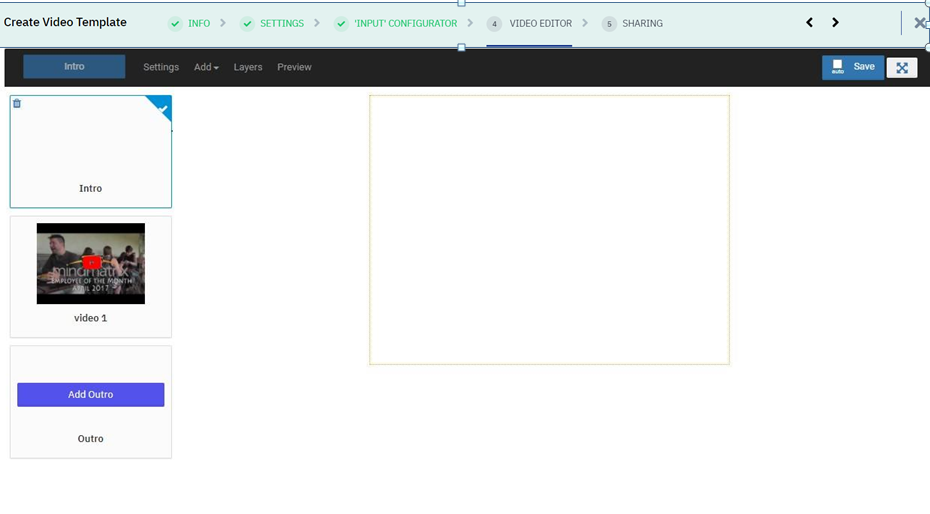
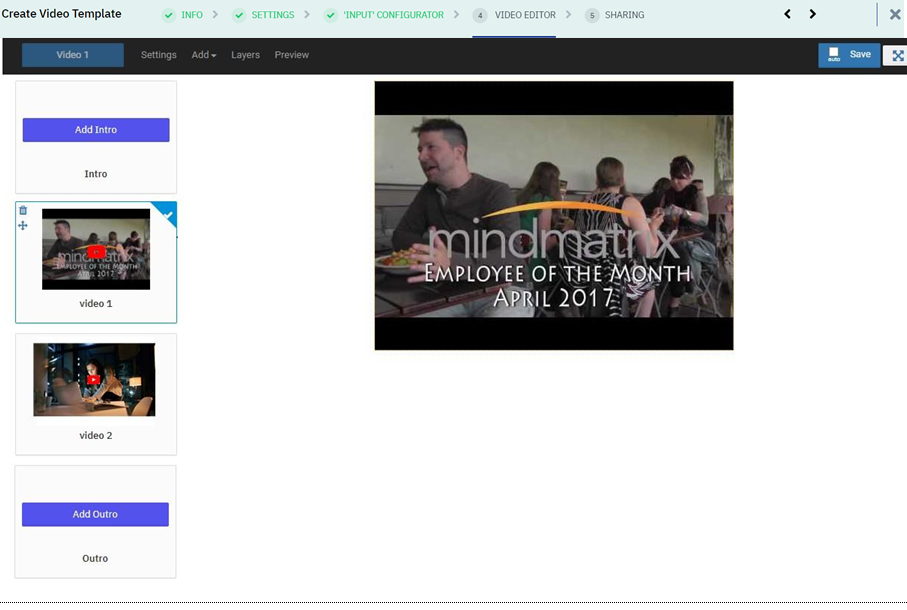
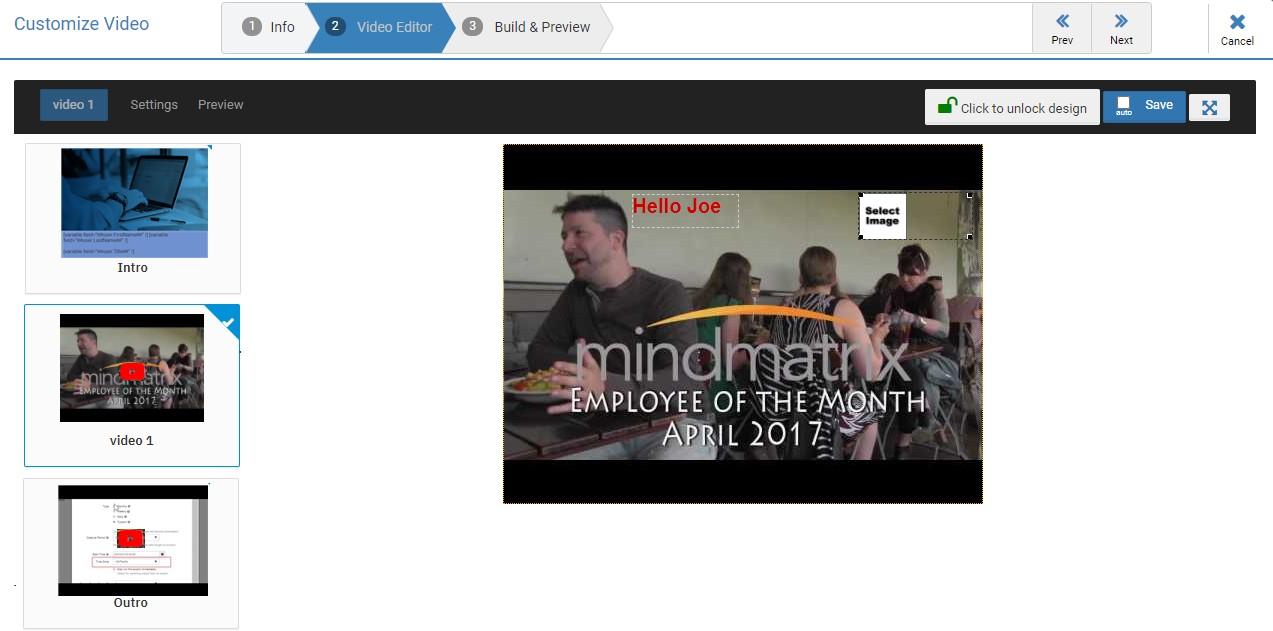
In this step, by double clicking on the ‘Select Video’ button, the User can add the video(s). This will list the selected video(s) on the left (similar to the “View and Sign” page of the Contract) for any videos added and provide the names as video 1 and so on, for the selected videos. The first video will be selected and the thumbnail will be loaded in the size of the video on the canvas.

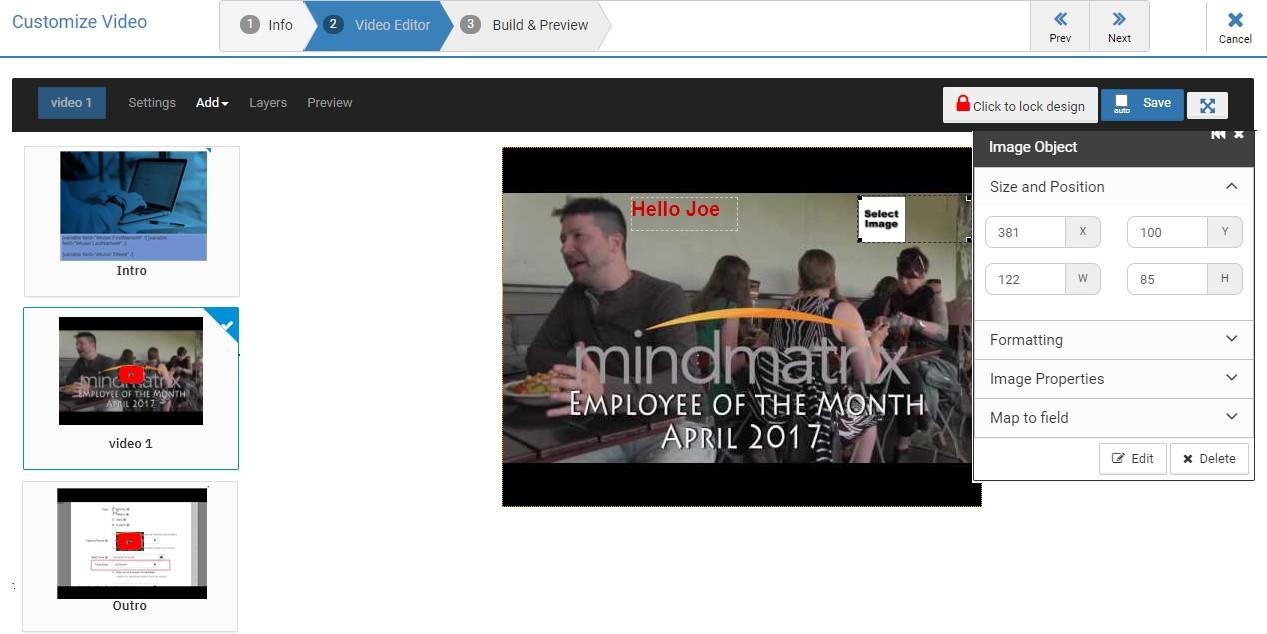
Users can add ‘Text’ and/or ‘Image’ objects to the video.
The objects will operate the same as in the ‘Print’ Editor with the option to lock each object for the Media Editor.
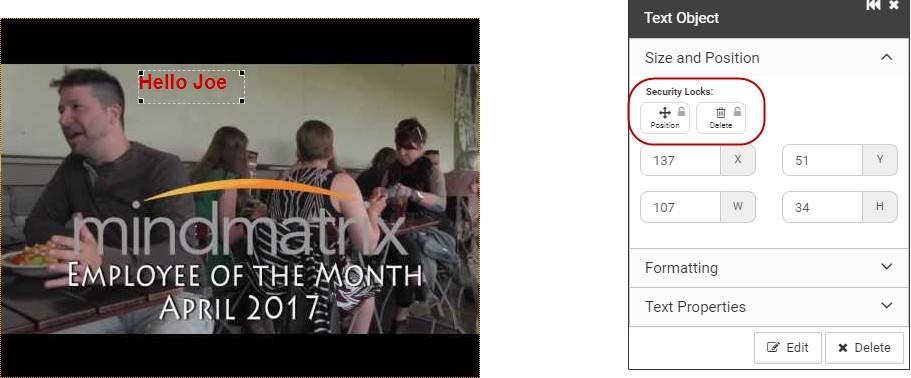
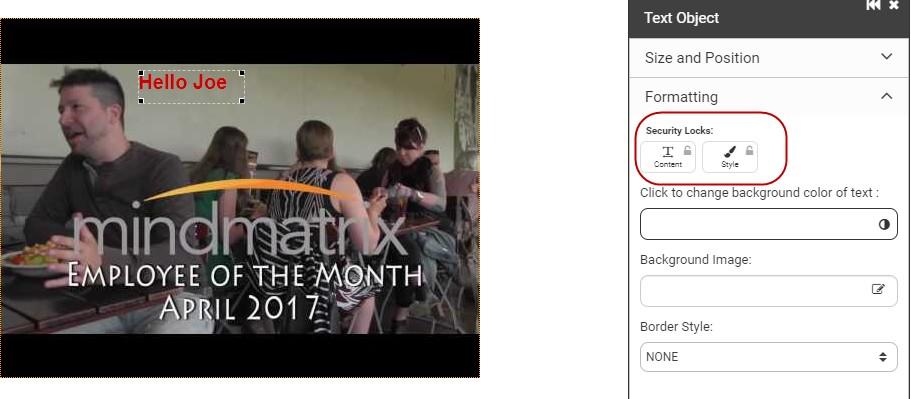
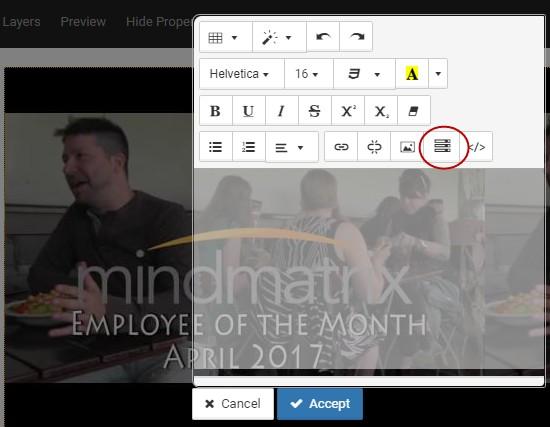
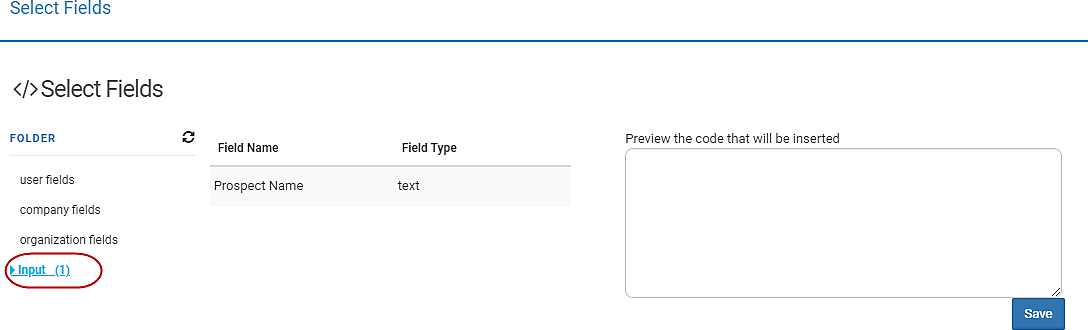
In the ‘Text’ object, users can add fields, and do other styling but Database, and Anchor will not exist.
In the ‘Field Chooser’, there will only be folders of User, Company, Organization, User custom fields, and Company/Organization custom fields that can be used. No ‘Contact’ fields can be added.
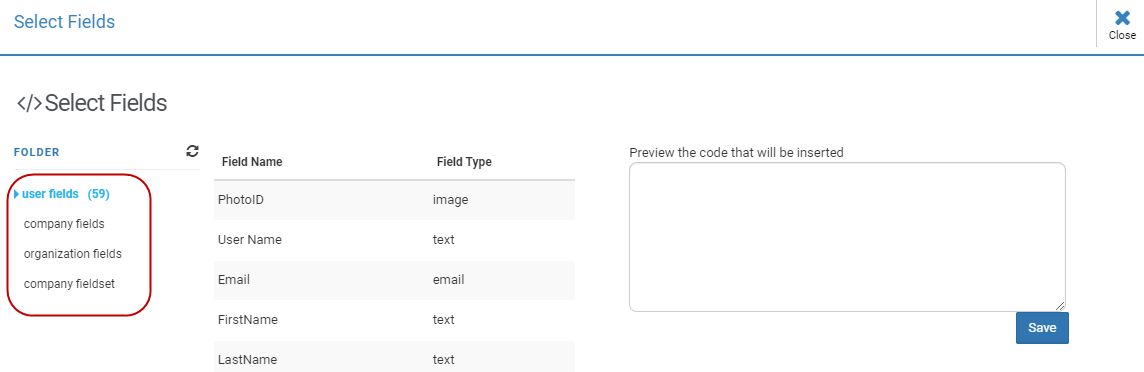
For the ‘Image’ object, only Company, User, and Organization fields can be mapped.

The objects added will be displayed throughout the video at the position mentioned. In the “Preview” modal, it will process only the section and display the video with personalization. Since this may take time, mention it in the ‘Loading’ section as well as on the click of the “Preview”.

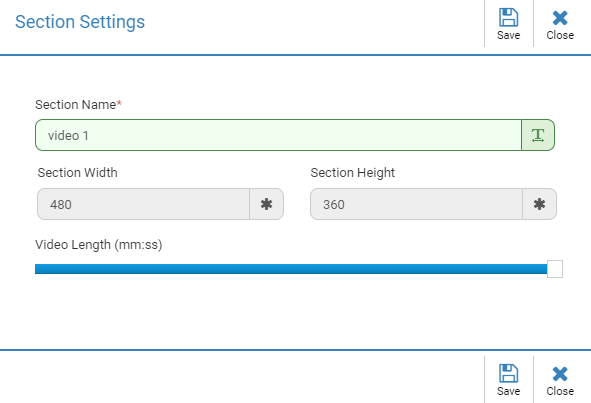
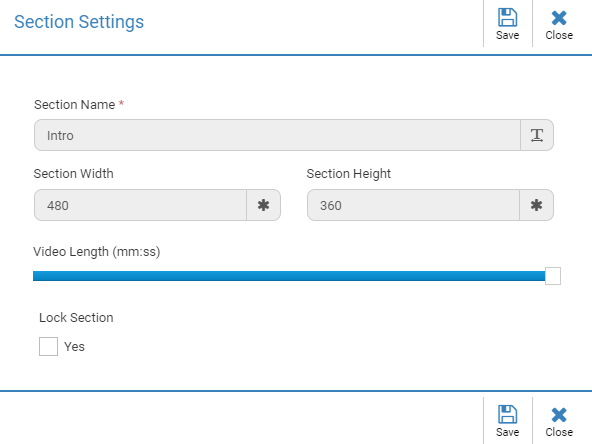
In the ‘Section Settings’, there will be an option to change the name of the section and move the video period slider to a lesser value to trim the video if needed. The default slider will be at 100% and will mention the length in ‘mm: ss’. The Height and Width will be in disabled mode.
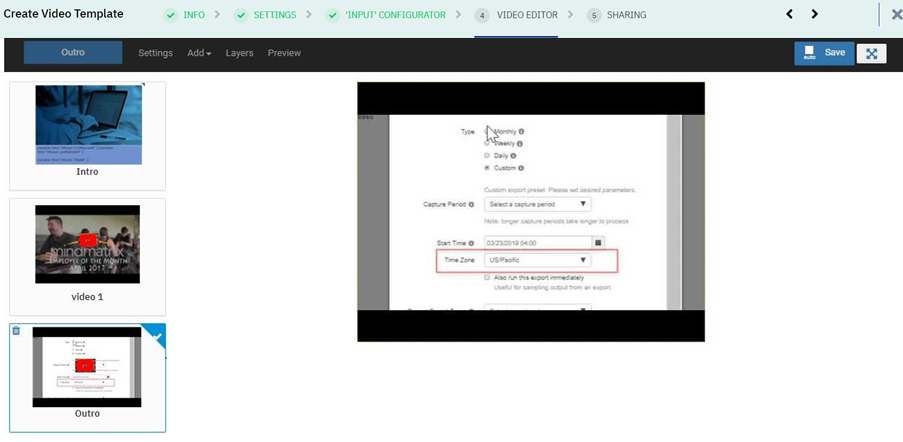
“Intro” and/or “Outro” sections can be added and on click of “Add” it will ask for adding of video for the section. The default will be “Yes”.

If the video is not selected, then it will add a blank section of the same size as the video section, and the User can remove the section by clicking on the ‘Delete’ icon.
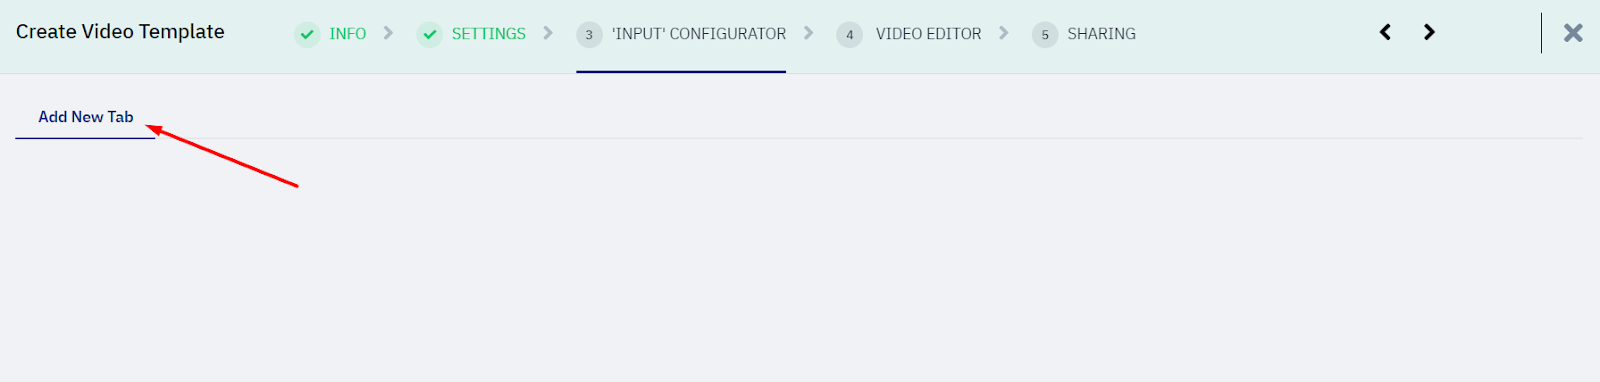
By clicking on Yes, the “INPUT CONFIGURATION” tab is visible, where we can create customize tab which is also visible in personalized video
Users can add ‘Text’ and/or 'Image’ objects to the section and lock them if needed, the same as in the ‘Print’ Editor.

If the video is not added, the “Preview” will display as plain HTML output as done for other template types after parsing all the variables.
The “Settings” for the section without video will have ‘Name’, ‘Section Height’ and ‘Section Width’ disabled, and the User can provide the ‘Duration in seconds to display the section in the Personalized Video and can also ‘Lock the Section’ so that in the Media Editor the section cannot be removed, nor new objects can be added.

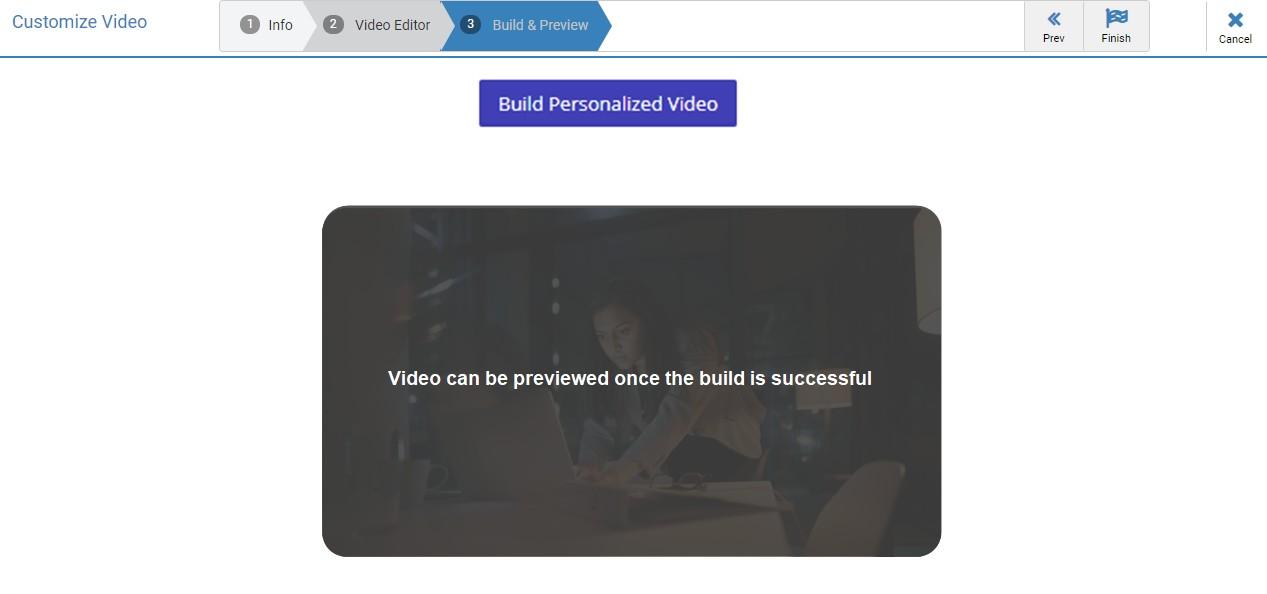
Step 4: Build & Preview
In this step, the user can build and preview the complete template.
(This has been explained in the Media Section later.)
Note: In the template, the only action available will be “Play”.
Step 5: Sharing
This is the same as for other asset templates.
If a video is added to a section, then the icon will be displayed on the thumbnail and the user can add objects to this section the same as in the Video Section.
The “Section Settings” will have the Section Name, Section Height, and Section Width disabled and the slider for the video length and locking of the section option.
If more than one video is selected for personalization, then those videos will be added between the “Intro” and the “Outro” section and there will be actions to ‘Delete’ and to ‘Move’ the sections between “Intro” and “Outro”.
If the “Input” option is selected then in the step process, there will be the step of “’Input’ Configurator” added before the “Video Editor” step and the 2nd step name will be reduced to “Pick Video(s)”.

Based on the fields added in the “Input’ Configurator”, these will be populated in the Field Chooser.
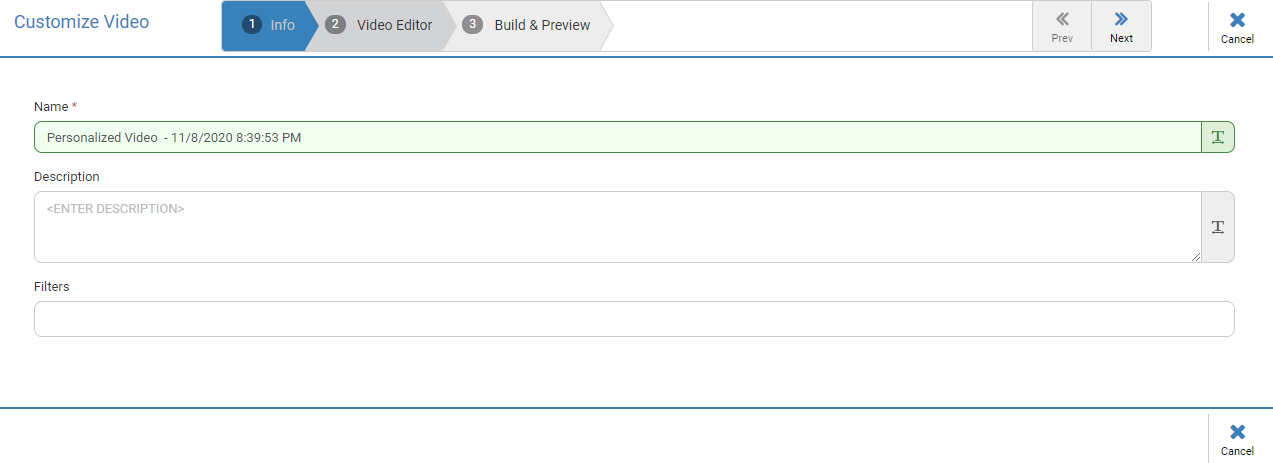
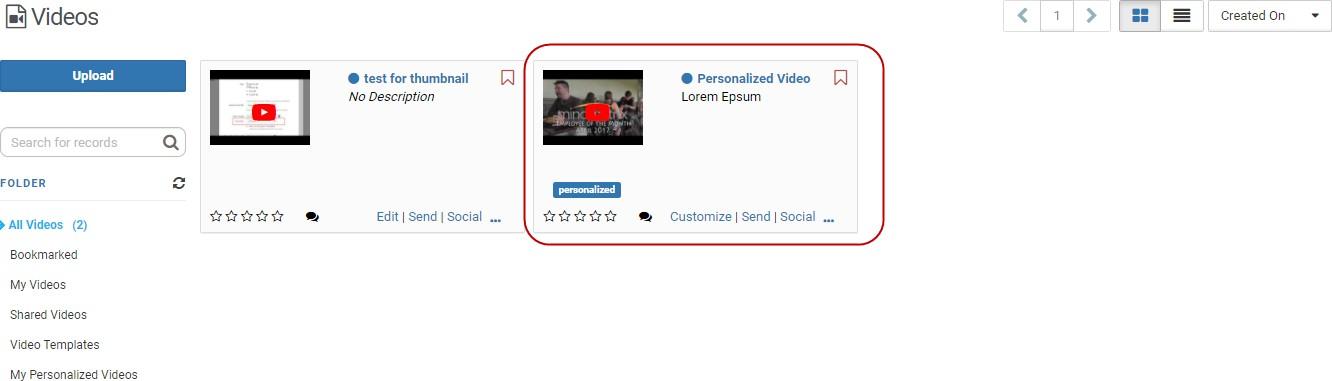
In the Video Gallery (not where video is to be picked), there will be folders for “Video Templates” and “My Personalized Videos”. All the created and shared templates will be displayed in the “Video Templates” folder and the only action available will be that of “Customize”.

On Customize, it will open the step wizard with the first step of “Info” and will have the video template name followed by date-time as the default name.
Step 2: Video Editor
This will be the Media Editor and like other Media Editor it will have the “Basic Editor” loaded by default where if objects are not locked the user can just edit the content.
Like other Media Editor, on ‘unlocking the design’ the user can add objects to the section, check the layers, and move/resize objects that are not locked.
Only those sections added in the template will be displayed in the Media Editor, i.e. If the “Outro” section is not configured, then there will only be “Intro” and the “Video” section.
If any of the “Intro” and the “Outro” section is added and locked in the template, it will be denoted by the “Lock” icon on the section in the “Advanced Editor”. For this section, the “Add Objects” and removal of the section will be hidden.
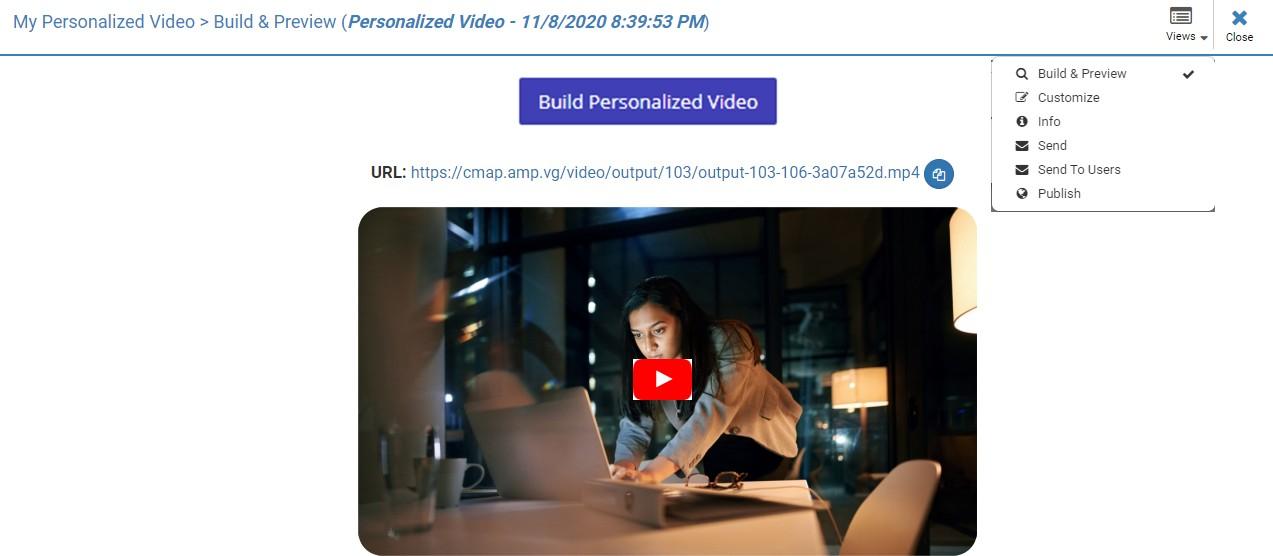
Step 3: Build & Preview
In this section, the user will build the complete video. By default, there will be a button and a placeholder for the video.
Clicking on the ‘Build’ button will build the video in the background and display the message. User can navigate from the page by ‘finishing’ the step wizard and can see the built video in “My Personalized Videos” and “All Videos” folder.
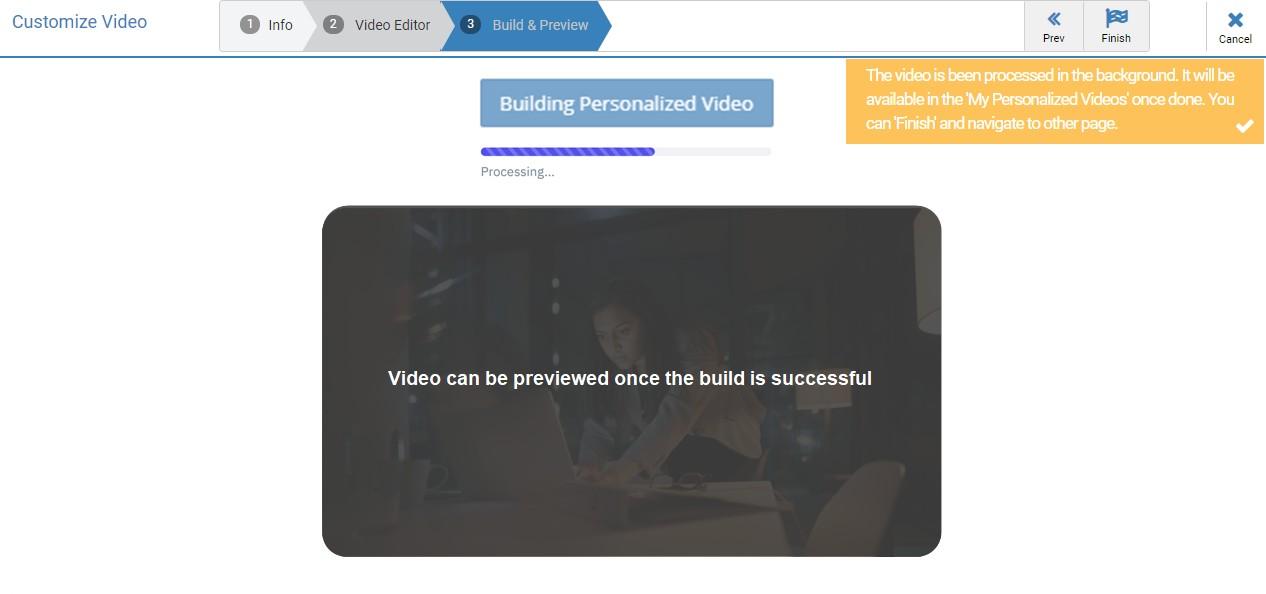
If user stays on the page for the building of the video to finish, then on successful completion the video thumbnail will be displayed in the placeholder and the video URL will be provided.
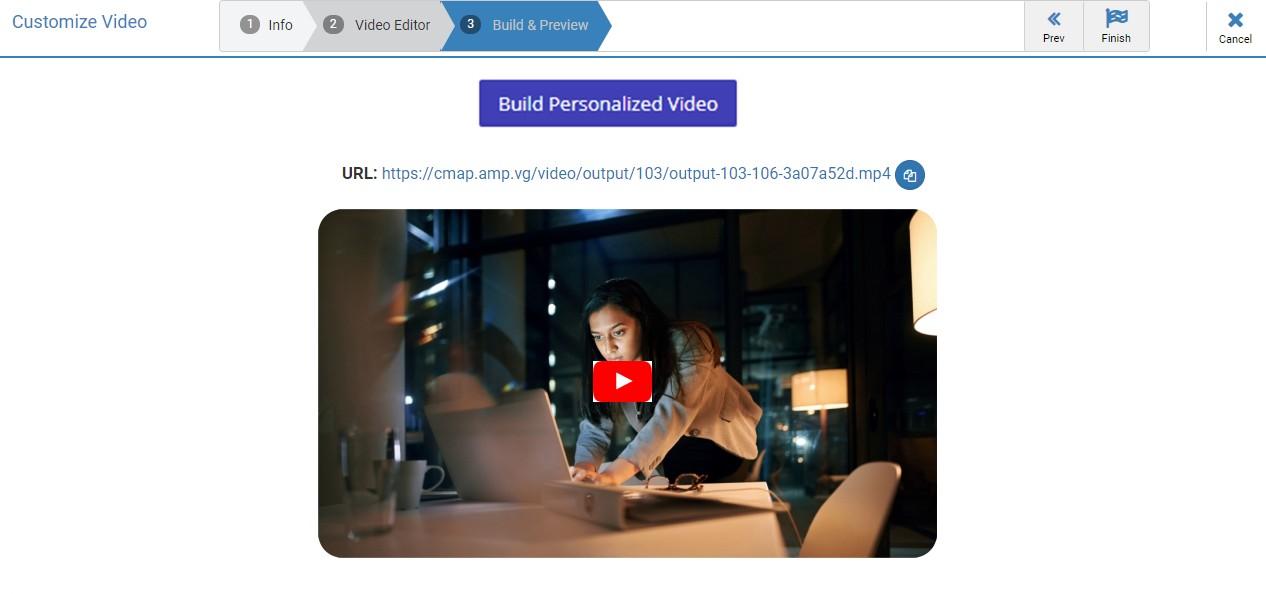
On mouse hover of the placeholder, the actions will be displayed for the video.

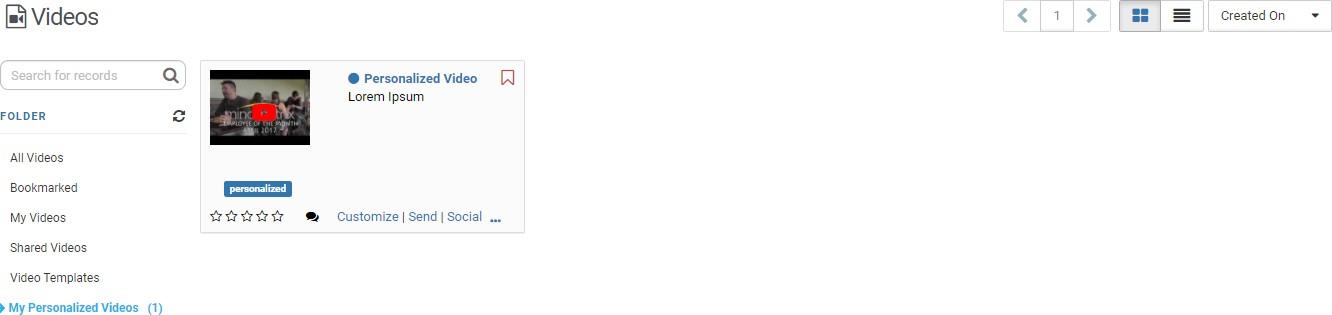
The built videos will be added to the “My Personalized Videos” folder and will have the actions of ‘Customize’, ‘Send’(based on permission), ‘Send to Users’(based on permission), ‘Social’(based on permission), ‘Delete’.
Clicking on the thumbnail will open the modal, with options of ‘Build & Preview’ (default), ‘Customize (will open Video Editor), ‘Info’, ‘Send’(based on permission), ‘Send to Users’ (based on permission), and ‘Publish’ (based on permission).
The videos will also be displayed in the “All Videos” folder with the same actions and the tag of “personalized” same as “My Customized” in Print.
Related Articles
How do I upload a video to the video gallery?
1. To upload a video into Mindmatrix, click on Assets > Non Personalized Assets > Videos. Note: On the Bridge platform, clients can personalize menu navigation to better suit the specific needs of their Users. Things may be under a different part of ...How do I select and send multiple assets from the asset search page?
This feature allows the User to select multiple assets across different tabs of asset search page and send them together in single email. Note: A User cannot select Email templates, Questionnaire (Input) templates and Database / Opportunity based ...How do I access and share my company's videos?
Accessing Videos To view all documents currently stored on your Mindmatrix software, go to “Assets” > “Non-Personalized Assets” > "Videos". In the Video Gallery section, you can view all documents available to you. You can choose the layout of your ...Enable Asset Sharing Notification
Once this setting is enabled, users will receive an email notification about assets as they are shared into the partner’s account. Also, we need to ensure that the "Send Email Notification" checkbox is also checked while sharing the assets. As shown ...How to personalize landing page links with a different domain
It is a good idea to create a subdomain and point that subdomain to a Mindmatrix URL so you can use your own URL in landing pages inserted into your website and to comply with some pay per click (PPC) advertisement company policies. Some online ...