How to Configure Webex Integration?
Introduction:
This article explains the process of integrating Webex with Mindmatrix, configuring Webex settings, pulling webinar details and invitees into Mindmatrix, and creating email and web form templates for sending webinar invitations to contacts. The integration allows you to manage webinars, track invitees, and send registration invitations using automated templates.

Configuring Webex in User Profile:
After Webex is enabled for the company, follow these steps to configure it for individual users:
Switch to your user account.
Navigate to User Profile and click View.
Scroll down and click the Configure Add-On link.
You will be redirected to the add-on page.
Enter your Webex credentials and configure the sync settings.
Set the Webinar Start Date and specify the Time Interval to start pulling webinars and invitees into the Mindmatrix platform.
Click Save to store your settings.


Creating Webinars in Webex Application:
To create a webinar using the Webex application:
Log in to your Webex account via https://companyname.webex.com
Navigate to Webinars and click on Schedule a Webinar.
Enter the Topic Name, choose the Time Zone, set the Date, and click Save.
After creating the webinar, select Edit in the Attendees section.
Click Add Attendees and enter the details of the invitees, then save.
Pulling Webinars and Invitees to MM:
After syncing with Webex, the following data will be pulled into MM:
Upcoming Webinars: Webinars that have not yet occurred.
Historical Webinars: Webinars that have already taken place.
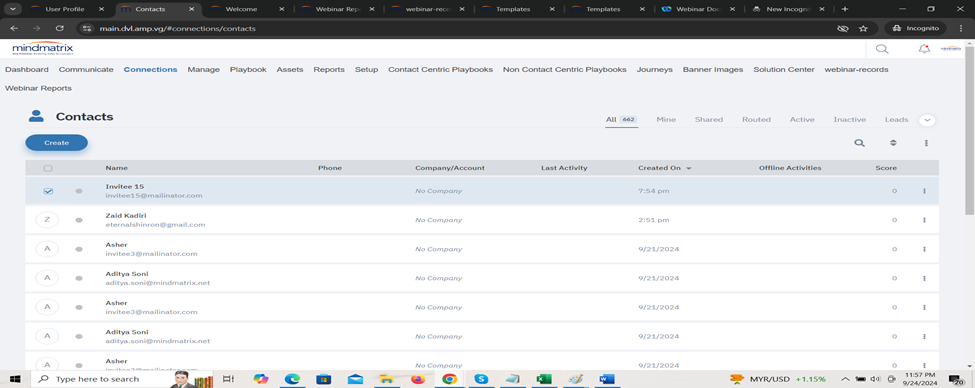
Invitees as Contacts: Webex invitees will appear as contacts in MM.

Creating Email and Web Form Templates
A. Creating an Email Template for Webinar Invitations
Navigate to Asset Management > Templates under Set Up.
Select the Email Template option and click Create.
In the Info Tab, enter the necessary data and click Next.
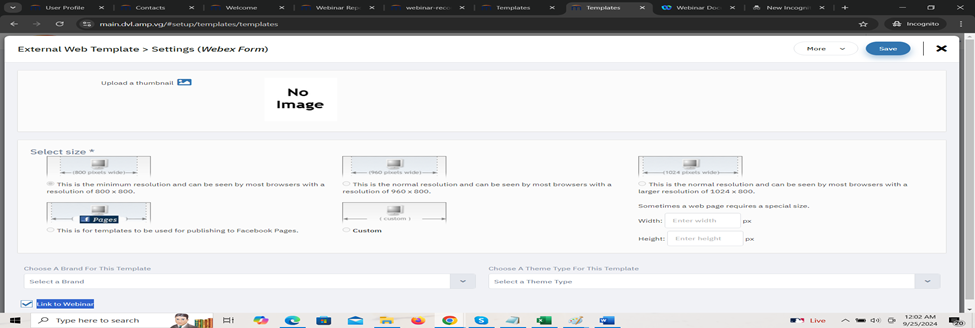
In the Settings Tab, upload an image if needed and check the Link to Webinar checkbox.
In the Editor Tab, choose between HTML Code or Insert option, and add webinar fields.
Once the Add Button is included, double-click on it and select Register Webinar from the drop-down menu.
Save the email template.
Note: The Link to Webinar checkbox is mandatory to check in the Settings Tab.


B. Creating a Web Form Template
Navigate to Asset Management > Templates under Set Up.
Select the Form option and click Create.
In the Info Tab, enter the required details and click Next.
In the Form Editor, add fields like First Name, Last Name, Company, Mobile, and Email.
Click Save to store the form template.
Adding Form to the Web Page:Under the Web Tab, click Create and enter the details in the Info Tab.
In the Settings Tab, select the Link to Webinar checkbox and proceed.
In the Editor, add the previously created form by clicking Add Objects > Form Container.
Double-click the form, select Connect with Webinar in the form container, and save the configuration.
Note: The Connect with Webinar checkbox is mandatory in the Form Container Object Section.

Sending Emails to Contacts for Webinars:
After setting up webinars and creating email templates, you can send invitations as follows:
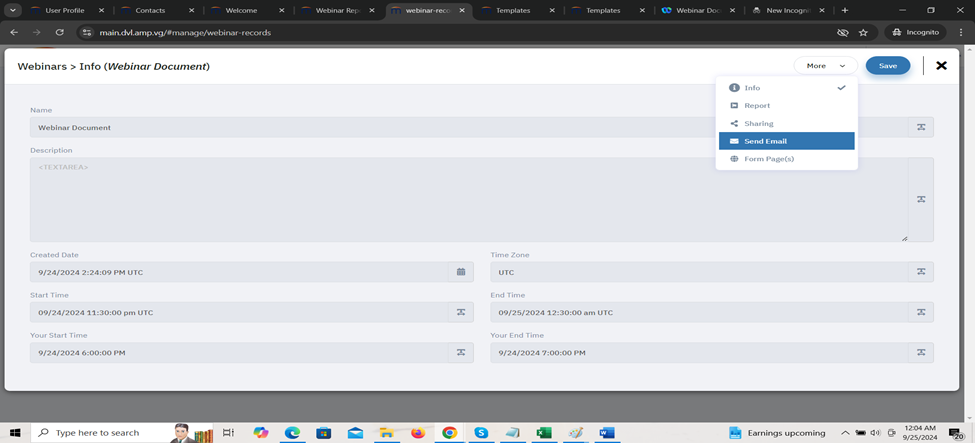
Select the specific webinar for which you want to send invitations.
From the More drop-down menu, click Send Email.
Choose the Webinar Email Template or Web Form Template and send the invitations to contacts.
Invitees will receive the email and can register for the webinar by clicking the Register button, which will complete their registration.
Webex Integration: User-Based Automation Across Multiple Modules
If Webex integration is configured in your account, you can now create and manage user-based automations using Webex activity data across multiple modules, enabling sophisticated user segmentation and engagement strategies.
Supported Modules:
This enhancement is available across the following areas:
User Smart List: Filter and segment users based on Webex activity
Company User List: Organize company users by Webex participation
User Drip: Create automated campaigns triggered by Webex conditions
User Scoring: Apply scoring rules based on Webex engagement
Available Webex Conditions:
The following values can be used to filter or trigger actions for users:
Registered: Users who registered for Webex sessions
Registration Date: Filter by specific registration timeframes
Attended: Users who attended Webex sessions
Completed: Users who completed full Webex sessions
Interacted: Users who actively engaged during sessions
Module-Specific Applications (How It Works):
User Smart List / Company User List: Use Webex conditions to filter and segment users based on their Webex activity patterns. This enables precise targeting of users who have demonstrated specific levels of engagement with your Webex content.
User Drip Campaigns: Create automated campaigns using Webex conditions as triggers. For example, if users meet a specific Webex condition (e.g., "Attended"), they can automatically be moved to a new recipient list or trigger a follow-up email campaign, enabling timely and relevant communication based on actual participation.
User Scoring: Apply scoring rules based on selected Webex conditions to automatically assign points to users who completed or interacted with sessions. This provides quantifiable metrics for user engagement and participation levels.
Targeted Segmentation: Create precise user segments based on actual Webex participation
Automated Follow-up: Trigger personalized campaigns based on specific engagement behaviors
Data-Driven Scoring: Quantify user engagement through automated scoring rules
Enhanced Analytics: Track and analyze user participation across Webex events
Improved Engagement: Respond to user behavior with timely, relevant communications
Post-Event Engagement: Automatically follow up with attendees versus non-attendees
Progressive Nurturing: Create different campaign paths based on session completion
Lead Qualification: Score users higher based on active participation and interaction
Behavioral Segmentation: Group users by engagement patterns for targeted messaging
This Webex integration enhancement enables comprehensive user-based automation by leveraging Webex activity data across multiple modules. Organizations can now create sophisticated segmentation strategies, automated campaign triggers, and data-driven scoring systems based on actual user participation in Webex events. This integration transforms Webex engagement data into actionable insights and automated workflows, improving user engagement and enabling more personalized, behavior-driven marketing strategies
Related Articles
Twilio Call Integration in Playbooks
This guide covers the complete implementation process, from initial setup and configuration through call script event management, voice call operations, and the technical architecture that supports the integration. Understanding these components ...Minimum Permissions Required for SFDC Community Integration User Profile
Standard Object Access Object Access Notes Account Read / Edit as needed Ensure access to required fields Contact Read / Edit as needed Ensure access to required fields Account Brand Read / Edit as needed Ensure access to required fields ...SFDC: CRM Sync Setting and Integration
The sections and functions related to CRM Sync Setting and Integration are listed below: COMMON SECTION: Please review below for the functions and its description: 1. Time Interval: It essentially illustrates how long synchronization should take. 2. ...Bridge 5.0 and HubSpot setup instructions
If you are not a Bridge 5.0 customer and you want to see how the Bridge 5.0 + HubSpot integration works, please Request a Demo. Step 1: Authorise HubSpot for Bridge 5.0 by authenticating to HubSpot from your Bridge 5.0 PRM instance via the available ...How do I Integrate Hubspot CRM with Mindmatrix AMP
Posted by The Team at Mindmatrix on 25 October 2016 01:53 PM CRM Integration Integration with some CRMs exist to support bidirectional sync Contacts This document details how to complete a Hubspot integration with the Mindmatrix AMP Platform. The ...