How do I Import Users?
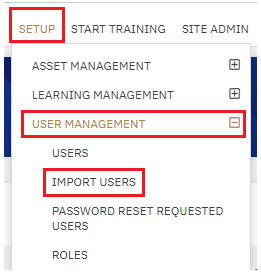
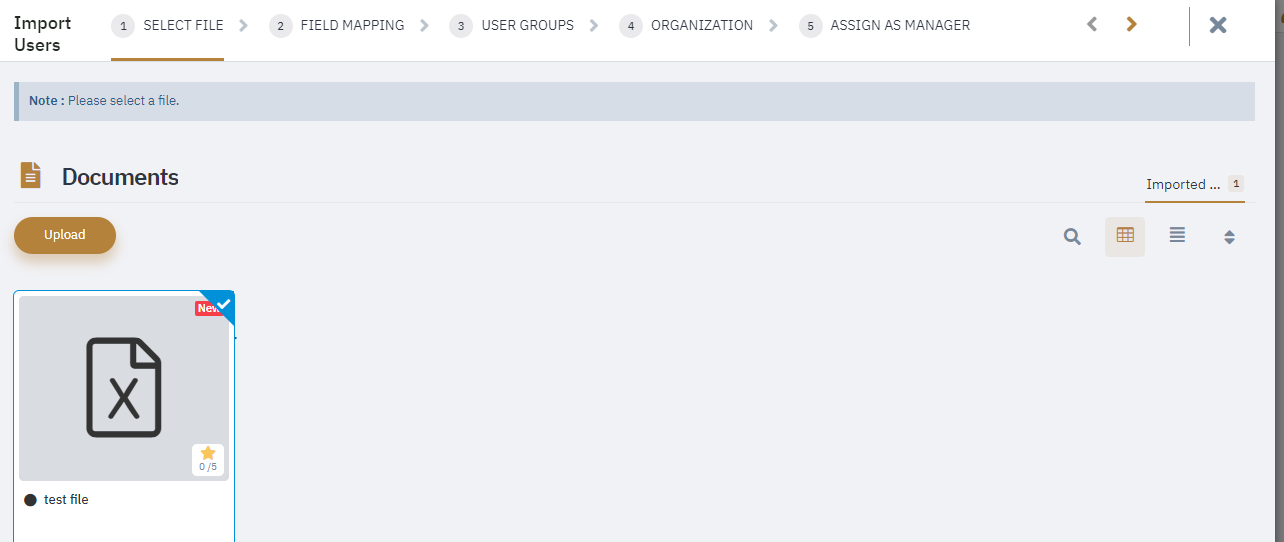
Note: Only administrators have access to this feature. Please contact your administrator or reach out to support@mindmatrix.net for assistance. 1) Go to Setup > User Management > Import Users: (Note: If your top navigation menu is customized, navigate to your “Import Users” page.) 2) Click on Import. Only .csv or .txt files can be used. 3) Click to upload the file from your computer. 4) Select the file if you have it already uploaded in your documents or Upload a New file and click on the top right arrow to go to the next step. 5) The next step is “Field Mapping”. This screen has multiple options:
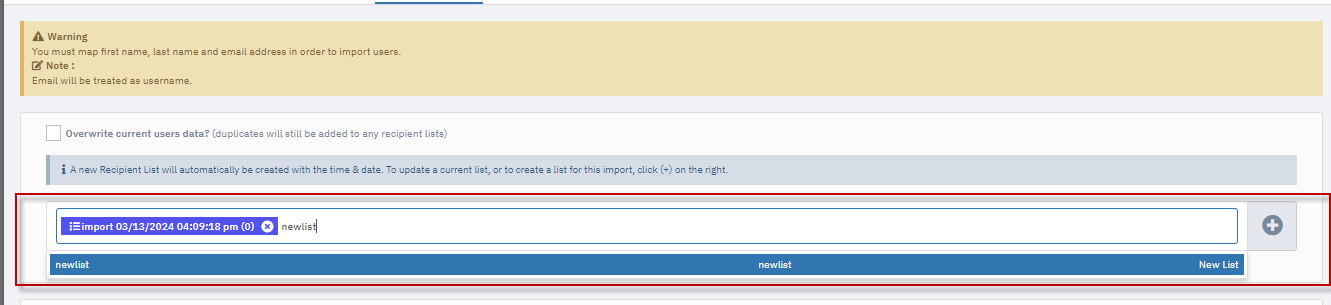
Creating a new user recipient list has never been more straightforward. Type the desired name into the appropriate field. Should the list be unique, it will be presented as a novel choice in the dropdown menu, enabling you to establish and select this new list. Please check the below screenshot for the existing users list:
6) If you’d like to immediately send an email notification with the temporary password to login, select the “On” next to “Send Temporary Password Email”. You can send this email to one of the following:
Once this is done, click on the top right arrow to go to the next step. 7) User Groups: Select “Add” to add the users in your import to their respective user group(s). This will give them the proper permissions they need in the platform. Click the top right arrow to go to the next step. 8) Organization: If these are partner users who all belong to the same organization, select “Add” next to their organization. If this is not a partner user list, or they belong to different organizations, skip this step by clicking on the top right next arrow.  A new enhancement has been introduced to the Import Users feature that allows administrators to dynamically map organizations while bulk uploading users. This improvement streamlines the user onboarding process by enabling automatic organization assignment and creation during import, reducing manual setup effort and ensuring data consistency. A new enhancement has been introduced to the Import Users feature that allows administrators to dynamically map organizations while bulk uploading users. This improvement streamlines the user onboarding process by enabling automatic organization assignment and creation during import, reducing manual setup effort and ensuring data consistency.Key Highlights
How It Works When selecting the By Field Dynamic option:
Benefits
Conclusion The enhanced Import Users feature with dynamic organization mapping significantly improves the user onboarding workflow by providing administrators with flexible options for associating users with organizations. Whether importing users to a single organization or distributing them across multiple organizations, this feature streamlines the process, reduces manual configuration, and maintains accurate organizational structure throughout the import operation. 9) Assign as Manager: If the users in your import are channel managers that need to be assigned to an organization group as a manager, select “add” on the group(s) they should manage. All the users in the import will be assigned to the groups selected. If not, skip this step. 10) Click on “finish” to complete the import. | |


Related Articles
How to Import Solution Records
Introduction and Overview The Solution Import enhancement enables users to import solution records in bulk into Solution Manager, reducing manual data entry and simplifying solution management. The import process supports automatic field mapping, ...How do I import an HTML email template design?
Users can make only textual changes to email templates/media that have been created using the ‘Import Design’ option. Why is this limitation in place? ‘Smart Objects’ and ‘Brand’ in the email editor are only compatible with a specific HMTL structure. ...I ran into an issue importing contacts, what should I do?
Posted by The Team at Mindmatrix on 21 March 2017 04:58 PM If you see an error message when importing your contact list, you should review your contacts for any data issues. 1. Check and make sure you have mapped fields. You should always map the ...How do I import Contacts?
It is possible to personalize navigation menus within Mindmatrix software. If you are unable to navigate to the correct page, contact your platform administrator. Posted by The Team at Mindmatrix on 08 September 2015 08:26 AM Before you begin, please ...Organization Import with Group Mapping - Comprehensive Guide
Introduction and Overview The organization import functionality has been enhanced with a powerful new capability that allows administrators to map organization groups directly during the import process. This significant improvement enables efficient ...