Implementation of Hotspot and Data Room Objects in Web Templates
Introduction:
The following guide outlines the steps for implementing Hotspot and Data Room objects in a web template. These new features allow for enhanced interaction within web templates, providing a more dynamic and engaging user experience.
Creating a Web Template with Internal/External Options:
Navigate to Web Templates:
- Begin by accessing the web templates section in your platform.
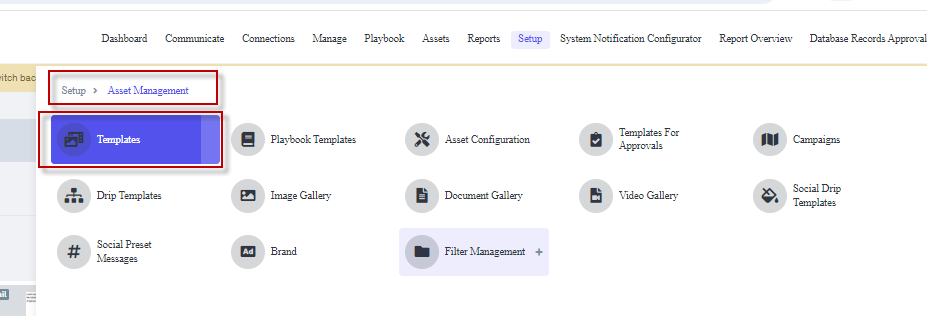
Select Internal or External Option:
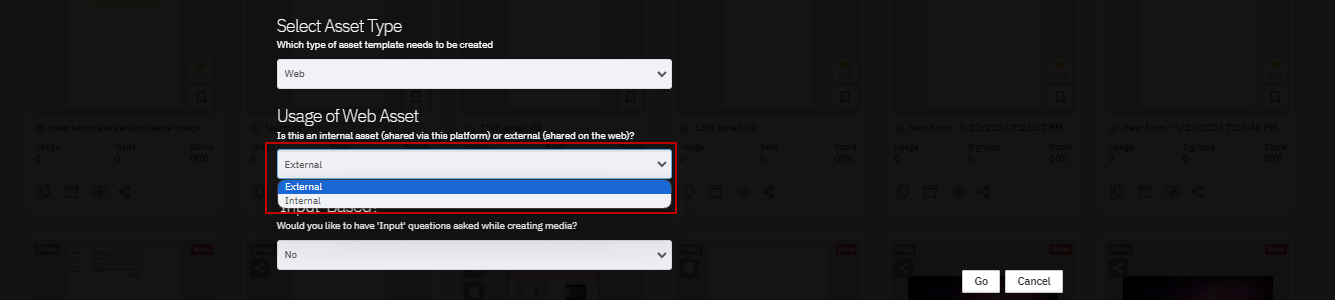
- When creating a new web template, you will be prompted to select either "Internal" or "External" options. This choice determines whether a media site is generated for internal or external web assets. The external option is set as the default.
- Select the desired option and proceed.
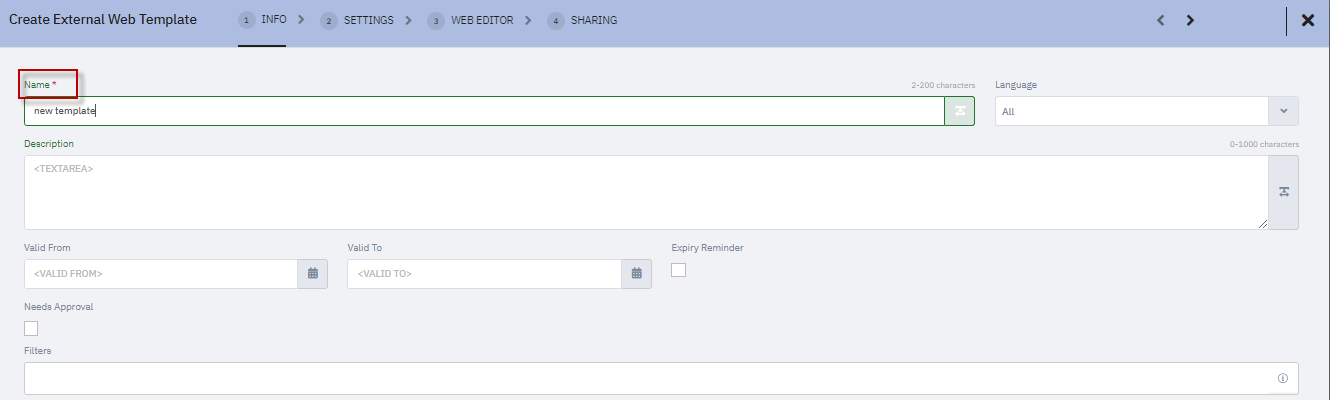
Assign Template Name:
- Enter a name for your template, then move to the web editor page.
Adding Hotspot Functionality:
Access the Web Editor Page:
In the web editor, the hotspot functionality can be enabled for web templates. This allows for interactive elements to be added to images, similar to the functionality available in web banners.
Select and Add an Image:
- Choose an image for your template.

Enable Hotspot Feature:
- Go to the image properties and check the "Can be used for hotspot" option.
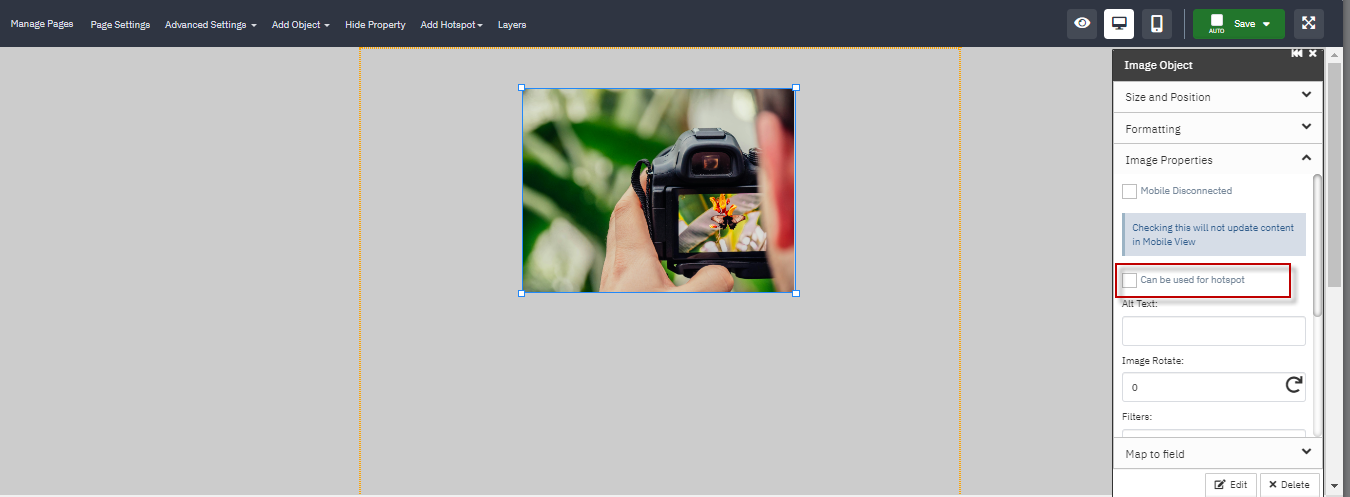
Add Hotspot and Menu Icon:
- Click on "Add Hotspot" and select a menu icon.
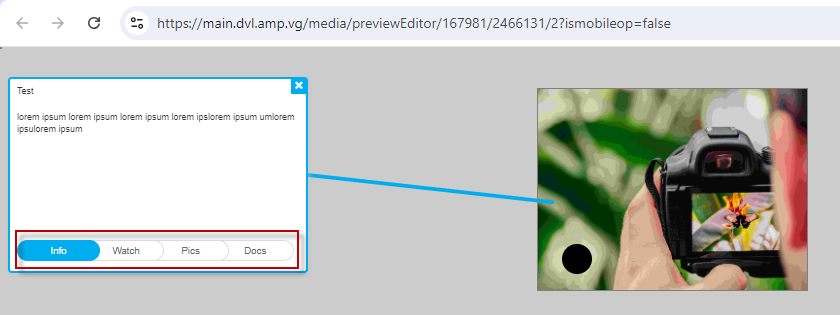
- Within the menu properties, you can add various elements such as title, description, images, videos, documents, and links to the hotspot.

Preview the Hotspot:
- After saving your changes, preview the template to see the hotspot in action. Hovering over the icon will display the added attachments (info, videos, images, and documents).
Adding Data Room Objects:
Access the Web Template Editor:
- Similar to the hotspot functionality, you can add data room objects to a web template. Start by selecting "External Web Assets" in the template creation process.

Add Data Room Object:
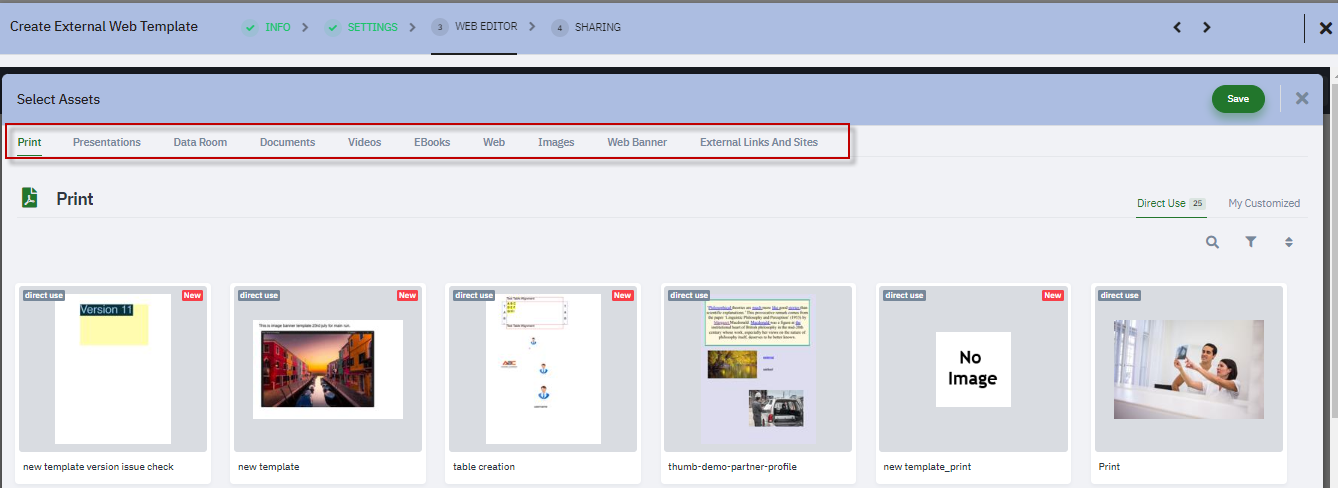
- Within the editor, click on "Add Object" and choose "Dataroom Object." This action will open the assets page where multiple assets can be selected.

Selecting Assets for the Data Room:
- Choose the desired assets such as print, presentations, documents, videos, eBooks, web pages, external links, and sites. Click "Save" to add them to the data room section.
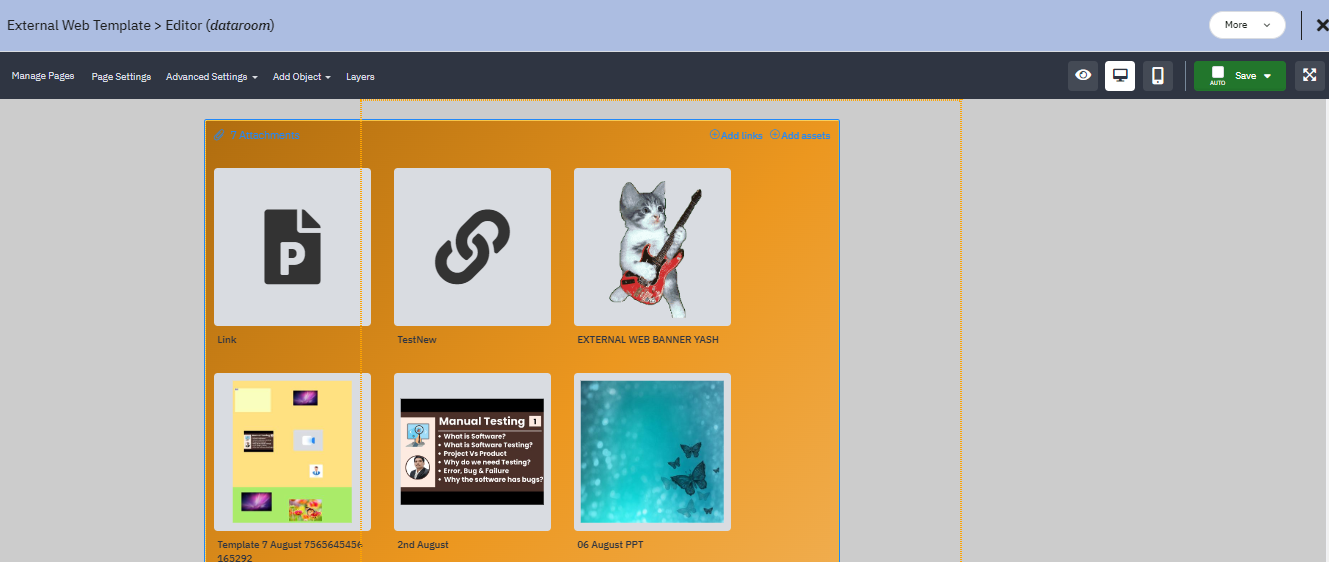
Preview and Customize Data Room:
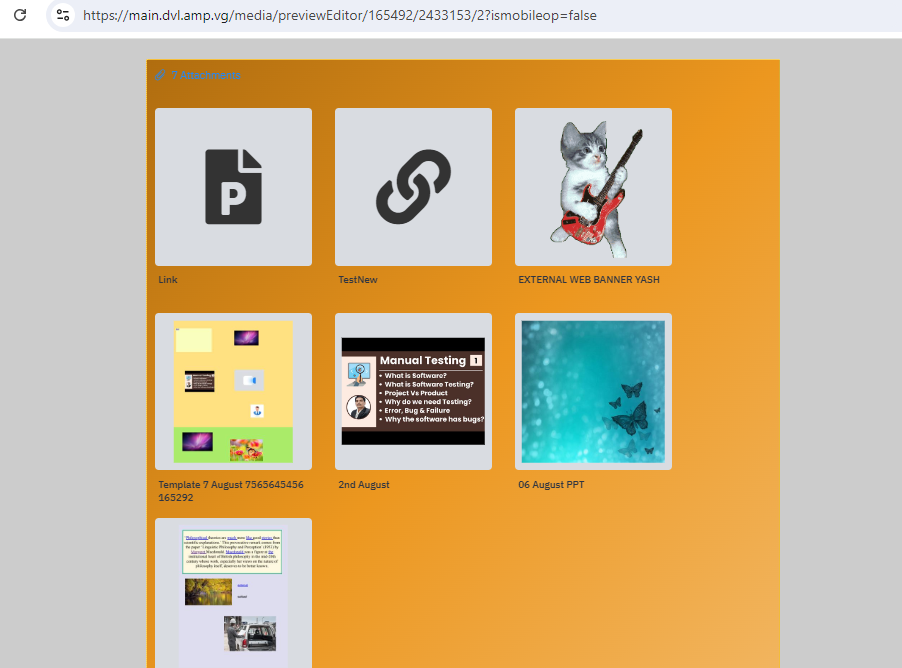
- On the preview page, all selected assets and links will be displayed.
Manage Landing Page:
- The data room object can also be customized on the landing page editor.
- After making necessary adjustments, finish the process by previewing the template and checking the data room display.

Conclusion:
This guide provides a comprehensive approach to implementing Hotspot and Data Room objects in web templates, enhancing the interactivity and functionality of your web assets.
This guide provides a comprehensive approach to implementing Hotspot and Data Room objects in web templates, enhancing the interactivity and functionality of your web assets.