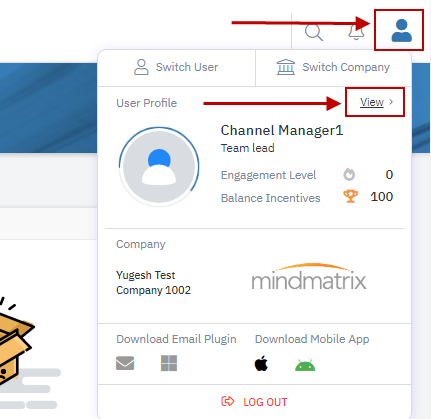
- To integrate AMP with your Autotask account, click on your User Profile at the top-right of the screen, then select "user profile" above your User Profile image.


- Enter your Autotask username, password & do not edit the web service URL as it will be auto-populated.
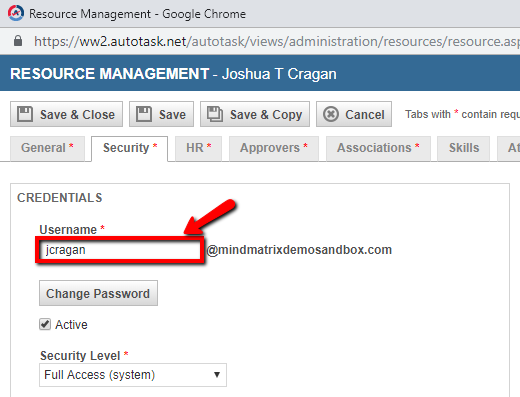
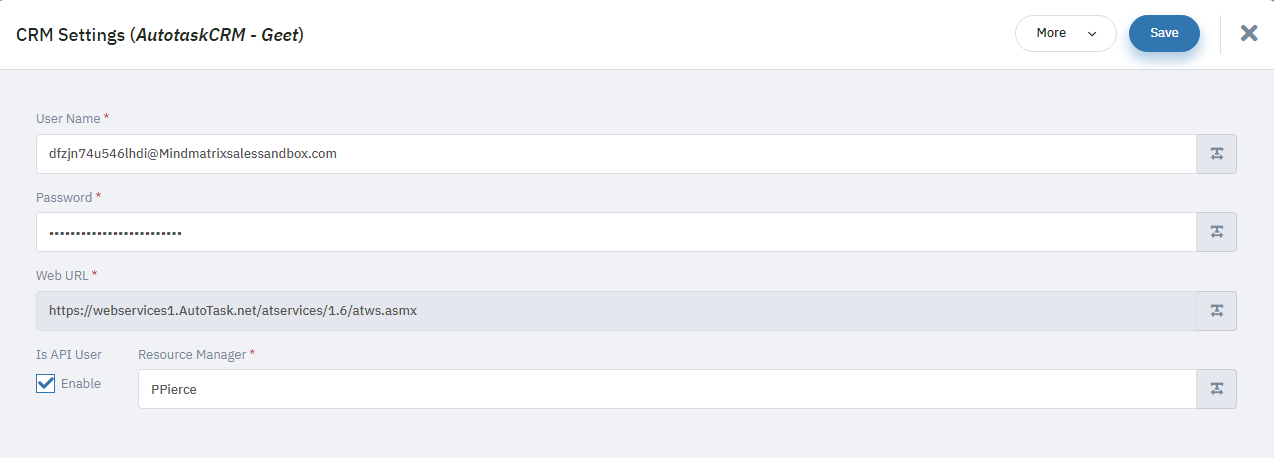
- To enable API user, you must setup an API user account, use the settings in (this article)
- The API User will not use a User License in Autotask, and will prevent direct access to your CRM; In this setup you need to associate a "resource manager" this is the user you wish to receive new leads or activities via the integration. The resource manager must only provide the "username" not the entire Email address (for example: JCragan)
- Click ‘next’
- Map your fields (Lead needs Email and Last name mapped, but is not used in Autotask)
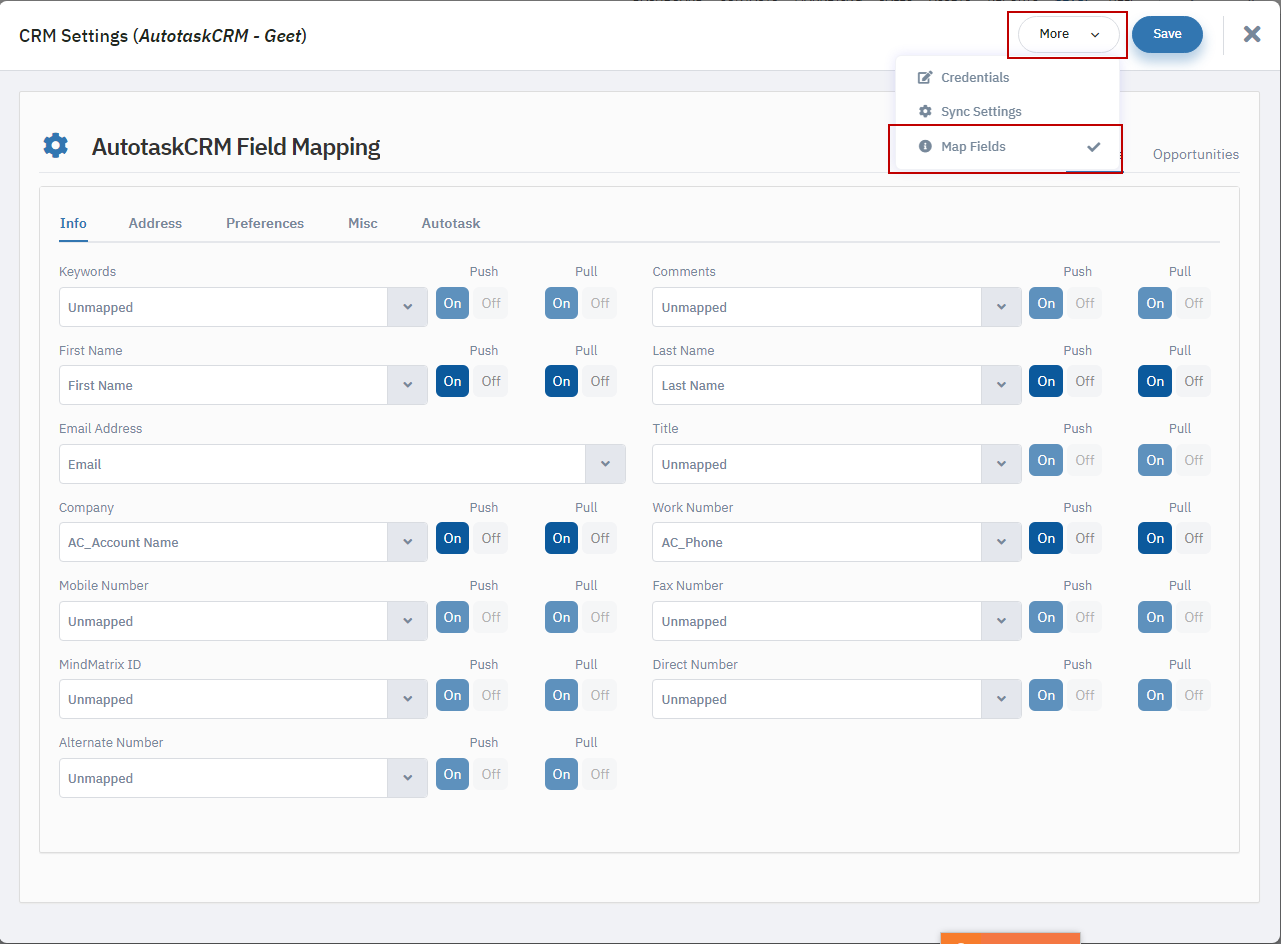
- Choose all relevant fields, match first name to first name, and company name to company name, etc. until complete. Then click "next' on the top right.
- The following page is the Sync Settings, choose any relevant settings within this screen

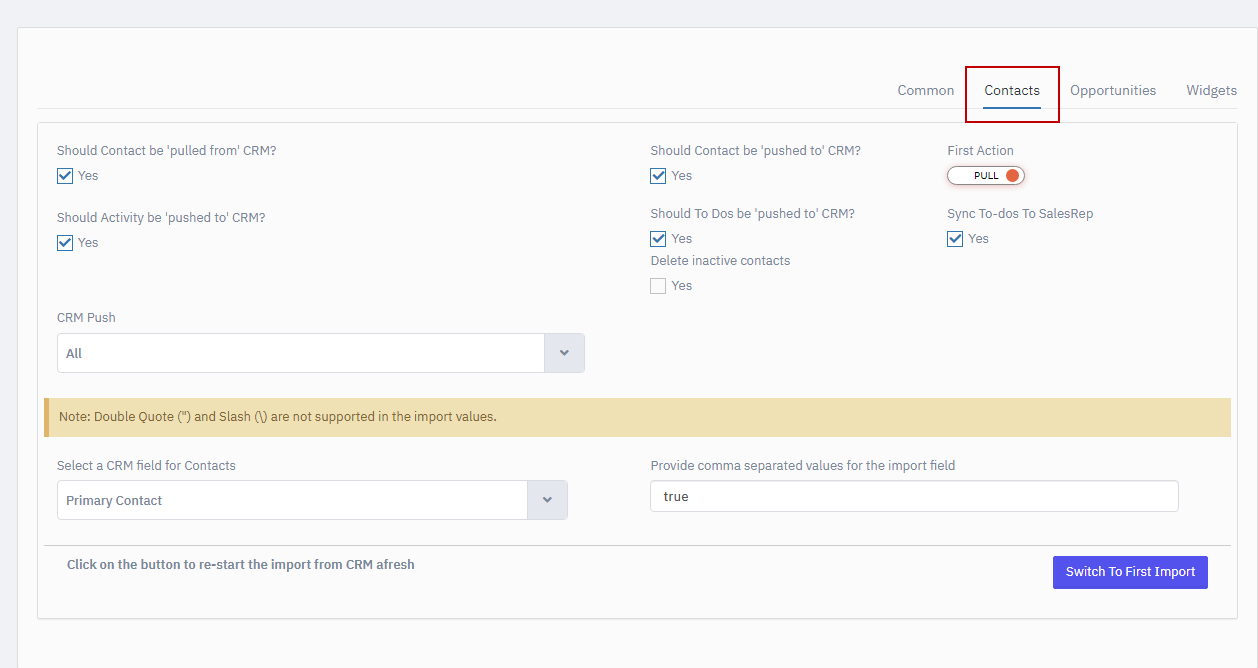 - Set time interval to 1 hour, 6 hours or 12 hours. (We only recommend 10 minutes for testing)
- Source of Truth will determine which product has the most up to date data and should be considered the standard for data.
- CRM selection: The product will never overwrite data in CRM and will only apply a value to a database record if the record is blank inside of CRM.
- AMP selection: The product will overwrite CRM data, and consider the data inside of AMP to be the standard. The CRM will only apply data to AMP if the field inside of AMP is empty.
- Both selection: the system will overwrite data both ways and new data will push from AMP based on lead score activity of contact record or manual pushing, and pull data to overwrite in AMP based on recent modified data from CRM.
- Is Blank Field Mandatory? Selection:
- If Checked: The product will not sync a contact record if there is required field on the receiving CRM.
- If Unchecked: the product will apply an “unknown” value to any required fields when syncing.
- Field for Import: choose a field to filter contacts into AMP. Remember Contacts will flow automatically into your AMP account from Autotask. You want there to be a filter to allow only specific types of contacts. We recommend Account Type as it fits most sales and marketing scenarios.
- Value to Import: The value for import is the value for the field you choose for contact filter. In the previous bullet we recommended Account Type, we would recommend a value of “Prospect” for this type of field, prospect is typically a denotation for a marketing contact. This will ensure that only Prospect Type accounts come into AMP for marketing purposes. This options supports a custom field or value.
- Click "Finish" at the top right and this completes the Autotask CRM integration with Mindmatrix.
- Your contacts will begin processing, check back after a few hours to see your contacts flow.
- Opportunity First Import should remain "unchecked" - Click Here to learn more about opportunity first import.
Syncing your Autotask contacts with Mindmatrix - As you integrate Mindmatrix with Autotask, existing contacts within the CRM, with a valid email address, status is active, and that match your predefined contact filter criteria get automatically synced with your Mindmatrix account. As you create new contacts with valid email addresses in Autotask, they will be auto-synced with your Mindmatrix account on the selected time interval.
- Sync Criteria:
- Status = Active
- Email address is valid (no spaces, has a valid top-level domain)
- Meets contact filter criteria setup by user on sync settings step.
- Contact limit is not reached (once the contact limit is hit in AMP, the sync will stop creating new contacts in your AMP account).
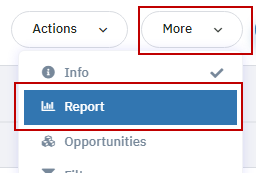
Syncing your Mindmatrix contacts with Autotask - To sync a Mindmatrix contact with your Autotask account, click on the contact. Make sure you are in the “Reports” view.
In this example, we clicked on “Views” and then “Report” to exit the info pane.
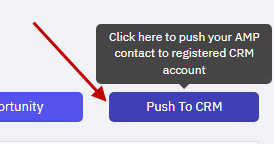
- Your Mindmatrix contact will be queued up to sync on the next sync time interval.
- There is also automatic syncing based on Lead Score. To adjust this setting go to Setup -> Lead score -> contact -> CRM -> then select an interest level to push automatically. Click Here to read more on CRM push setting.
Generating Todo activities in Autotask- Refer to our Todo generation guide to learn how to setup your AMP todo activities.
- Any AMP generated Todo's can be seen in Autotask under the contact record -> To-dos.
Dashboard To-Dos: 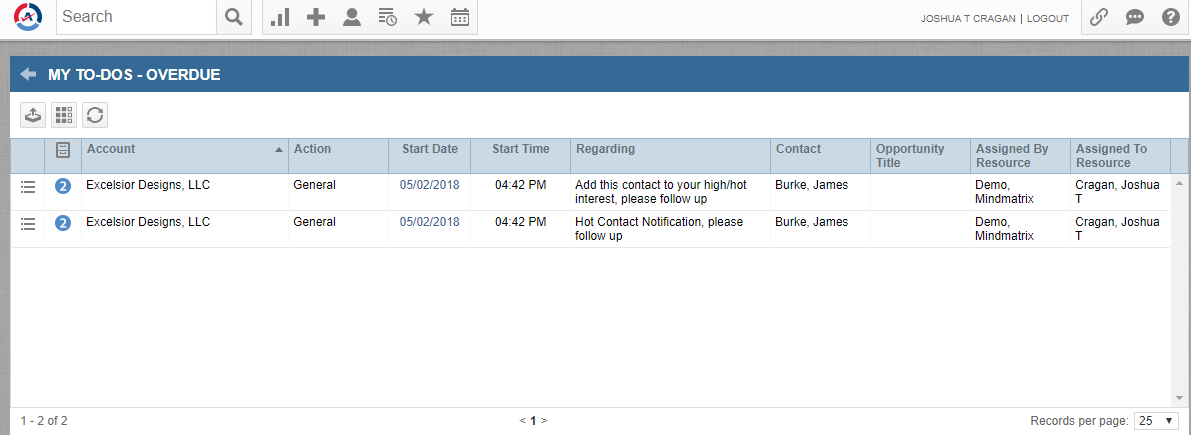
Contact To-Dos: 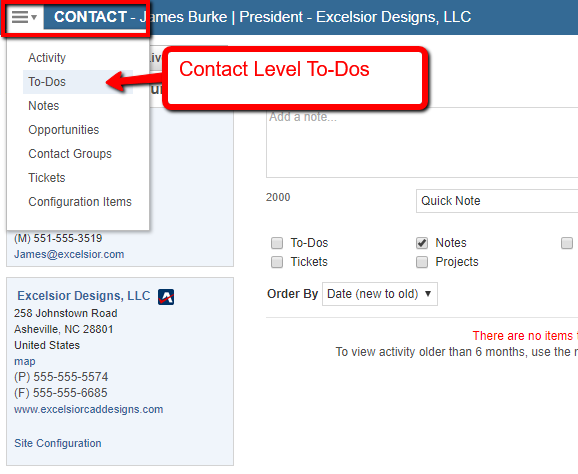
Account To-Dos: 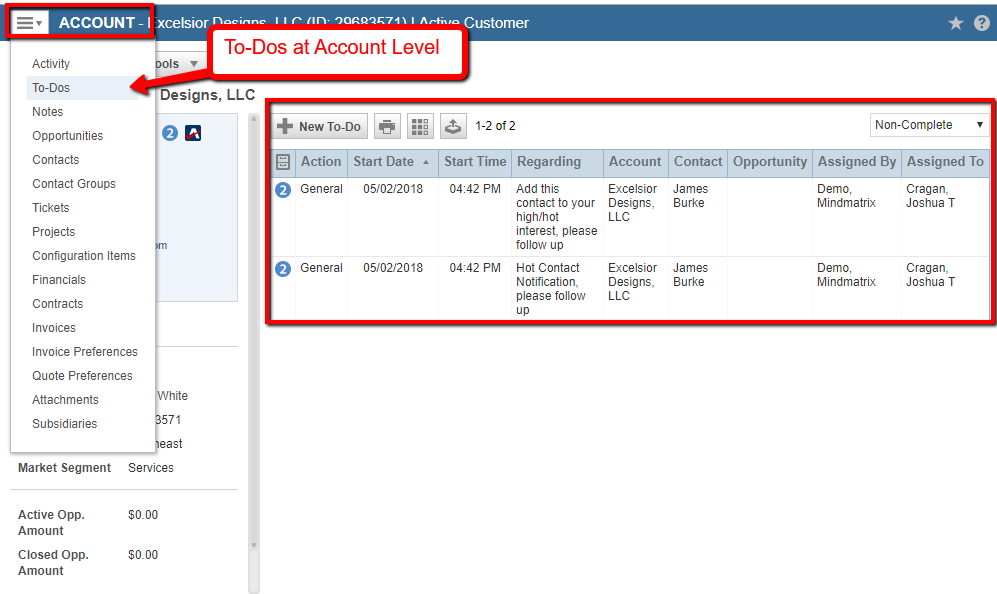 |


