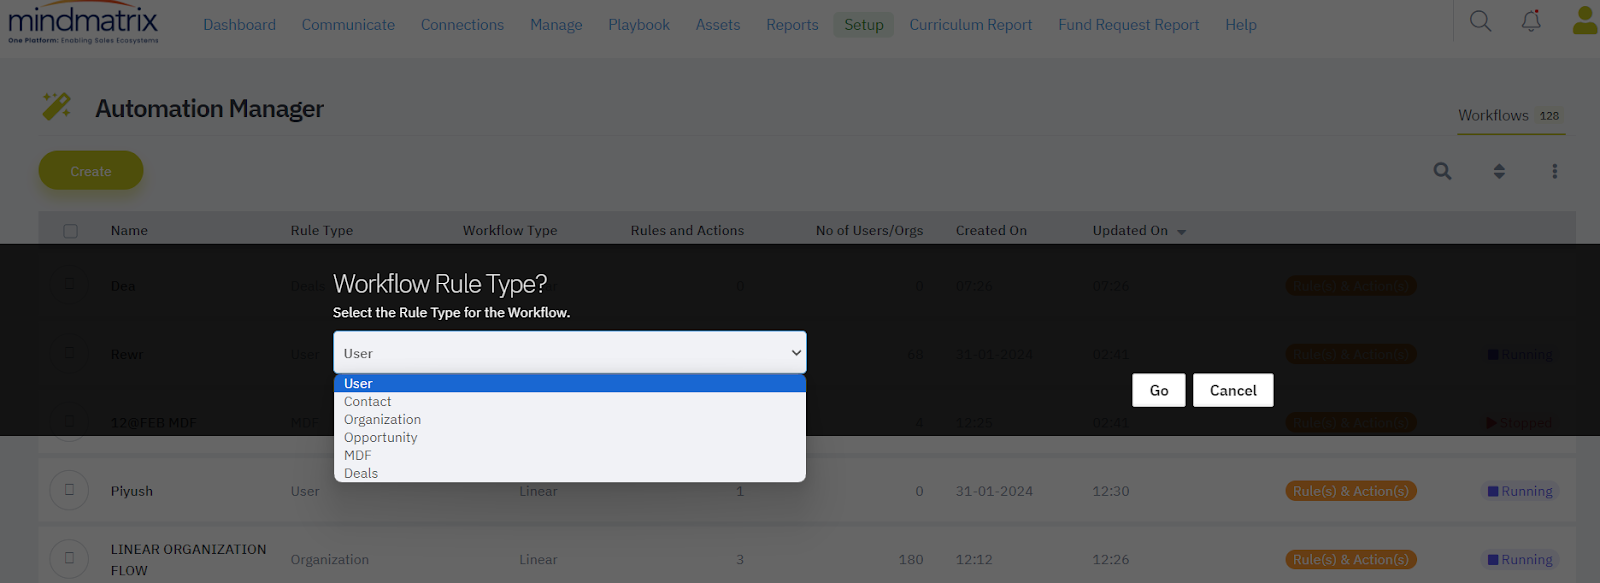
How do I use the Automation Manager?
- Users are your team members or partners who log into the platform.
- Contacts are your end prospects, customers, or other points of contact that you normally send email communications to in the platform.

Automation Manager Update:
The automation workflow rule for the 'User' type now includes a new condition: "Member of Organization." This addition enables you to create automation rules that target users based on whether they are added to an organization or not. Click next to set up your actions.

In the Automation Manager, you can now create rules to share Deals with Partner Admins and Channel Managers. This feature allows you to manage and control who can access specific deals within different organizations.
To set this up, follow the steps below:
Create the Automation Rule:
Navigate to the Automation Manager and create the automation rule for the Deals you wish to share.
Once the rule is created, go to the 'Sharing' option provided in the dropdown.

Sharing with Partner Admins:
After selecting the "Sharing" option, navigate to the Partner Admin tab.
In the Partner Admin tab, you can search for and select the organizations with which you want to share the Deals.
Once the organizations are added, the Partner Admins associated with these organizations will have access to view the Deals.
Sharing with Channel Managers:
Similarly, you can share Deals with Channel Managers by selecting the Channel Manager tab.
Add the relevant organization groups where the Channel Managers are assigned.
The Channel Managers associated with these groups will be able to view the Deals in their accounts.
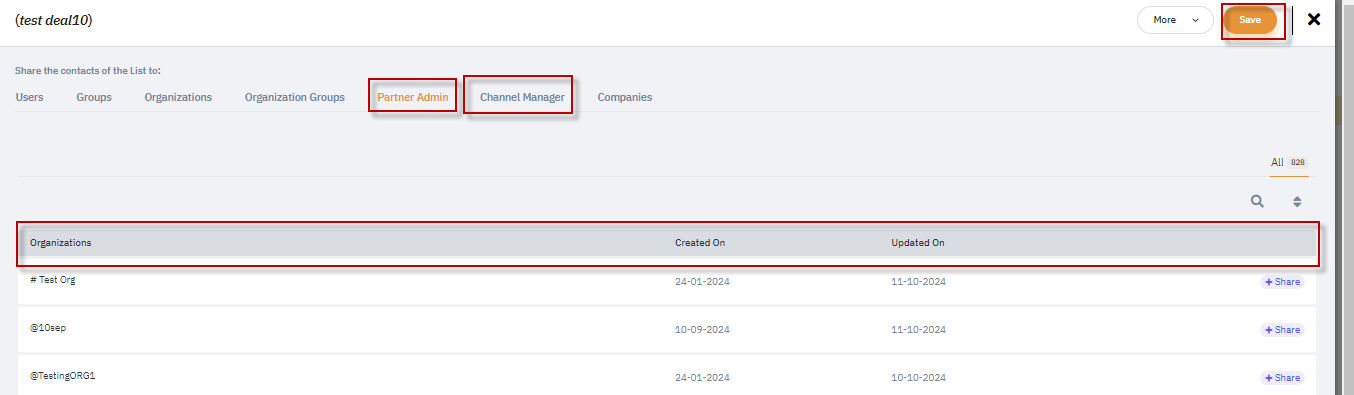
Saving and Finalizing:
After setting up the rules and selecting the organizations or groups, click Save to ensure that the changes are applied.
This feature provides enhanced control over how Deals are shared across Partner Admins and Channel Managers, making collaboration more seamless within the platform.
Similar to User Smart Lists, the Automation Manager now supports filtering users based on Deal Registration data for the User workflow type. This enhancement enables more targeted automation by allowing workflows to trigger actions based on deal-related criteria, improving the precision and effectiveness of automated user engagement.
How to Configure Deal-Based Conditions
Navigate to Automation Manager (installurl/setup/automationmanager) and select the User workflow type.
Create a new automation for the user role.
Click Rule / Roles and Actions. Once redirected to the new page, click on "Add User Rules and Actions."
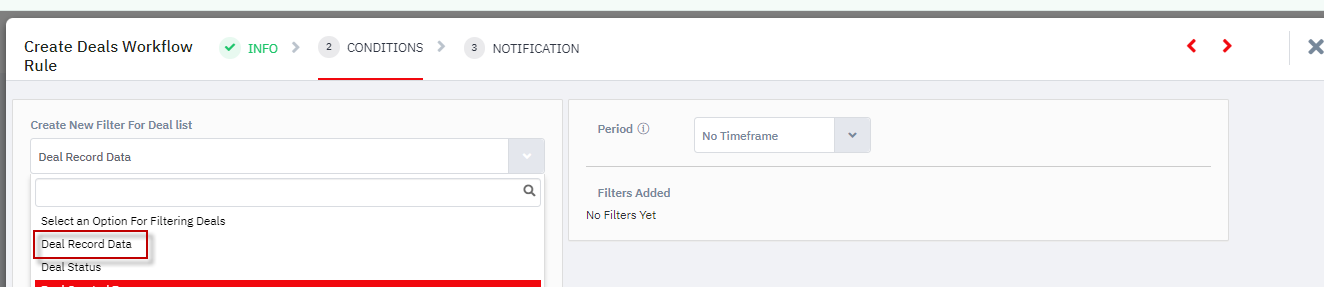
In the Conditions section, open the dropdown and search for Deals.
Select Deals to view all available deal-related conditions.
Available Deal Conditions
The following deal-related conditions are available for filtering users in automation workflows:
Deal Record Data – Displays all fields used during deal registration and enables filtering users based on specific deal form field values.
Deal Status – Allows filtering users based on the current status of their deal registrations (Approval Needed, Approved, Rejected, Converted to Opportunities).
Deal Created By – Enables filtering users based on the entity that created the deal (User, User of a User Group, User of an Organization, User of an Organization Group).
Use Cases
Trigger workflows when users register approved or rejected deals.
Automate role assignments, notifications, or scoring based on deal outcomes.
Segment users dynamically based on deal ownership and status.
Conclusion
The addition of Deal Registration-based conditions to both User Smart Lists and Automation Manager significantly expands the platform's capability to segment and engage users based on their deal activities. These enhancements enable administrators to create more targeted user lists, trigger precise automated workflows, and gain deeper insights into deal-related user behavior, ultimately improving the effectiveness of marketing campaigns, partner engagement, and sales operations.
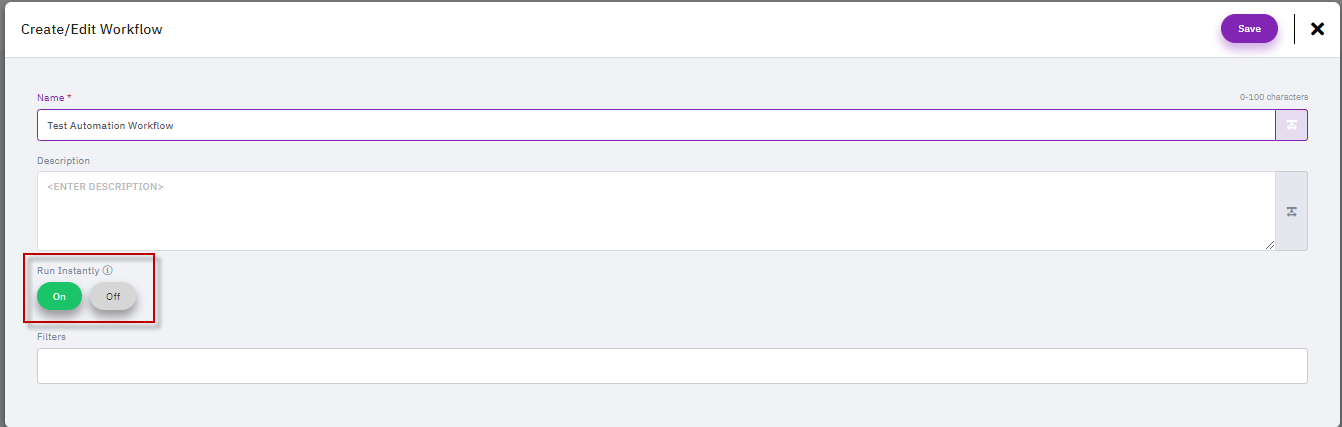
The Automation Manager Workflow now includes a new option called 'Run Instantly.' Enabling this option ensures that the updated action takes place immediately after the condition is met
Feature Update
A new notification option has been added in the Automation Manager, enabling users to notify the owners of deals via email directly from the workflow settings. This functionality improves communication and ensures timely updates for deal owners.
Steps to Configure Notifications in Automation Manager
Access the Deal Workflow
Navigate to the Automation Manager section of your CRM.
Select or create a workflow for deals.
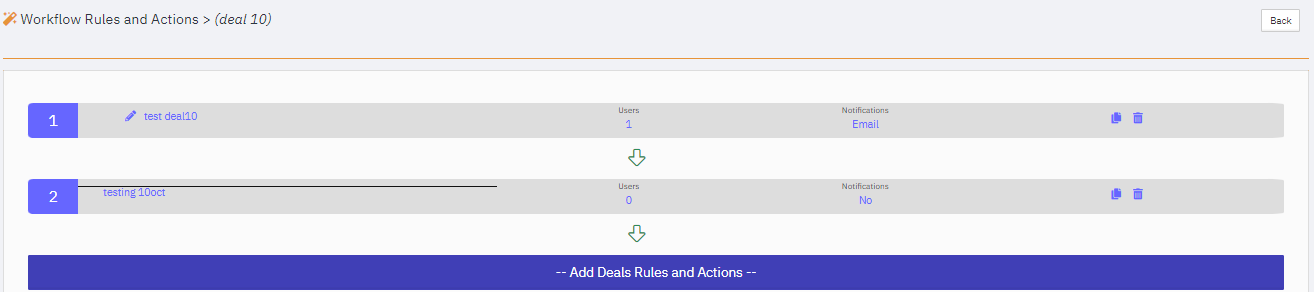
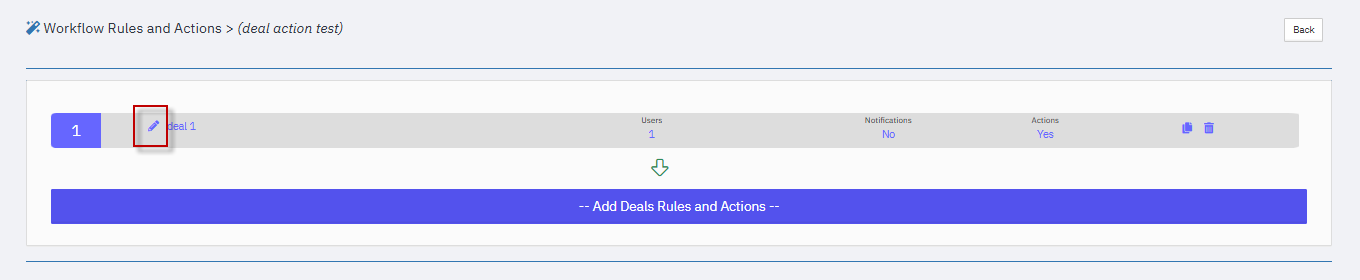
Edit the Workflow Rules and Actions
Locate the workflow rule you want to edit.
Click the Edit icon (as shown in the screenshot below).
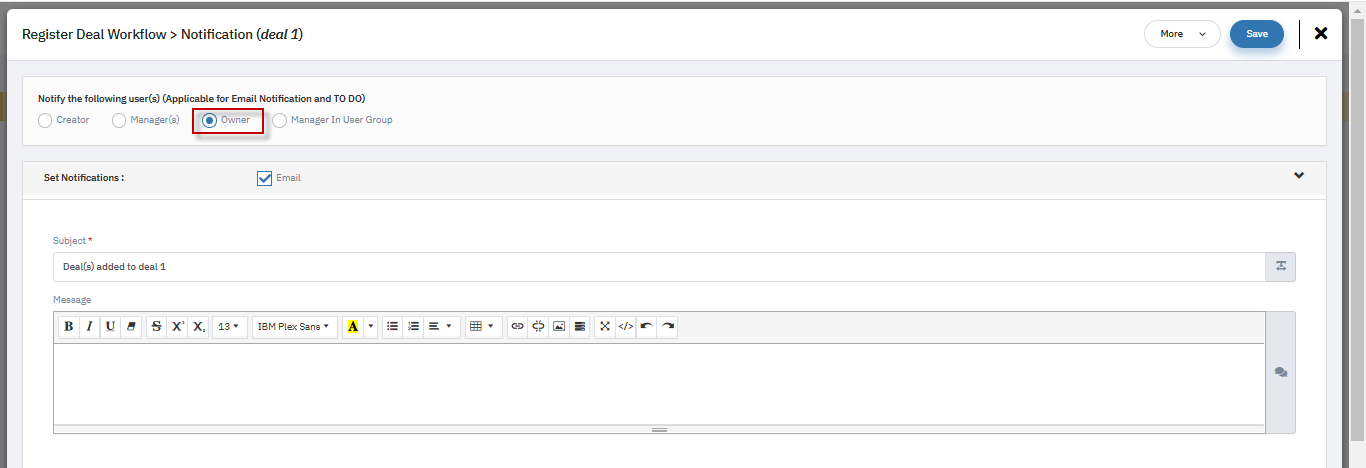
Set Notification Rules
In the Notification section of the workflow, enable notifications for the desired recipients.
Options for recipients include:
Creator
Manager(s)
Owner
Manage-In User Group
Configure Email Notifications
Check the Email box to enable email notifications.
Specify the Subject and Message for the email notification.
Customize the content as required, such as:
Subject: [Deal(s) added to your workflow]
Message: Deal [Deal Name] has been updated. Please review the changes.
Save and Activate
Save the notification settings.
Activate the workflow to start sending notifications.
Conclusion
The notification feature in the Automation Manager ensures deal owners and other stakeholders are updated in real time. With this feature, you can:
Improve collaboration by keeping relevant users informed.
Streamline workflows by automating communication.
Enhance responsiveness to deal updates.
Leverage this feature to maintain smooth communication and efficient deal management.
Feature Update
The Automation Manager now includes a new feature that allows users to automate updates to registered deal lists. This functionality simplifies workflows by applying predefined updates to deals when specific conditions are met.
Steps to Implement Actions for Deal Lists
Create a Workflow for Deals
Navigate to the Automation Manager and start creating or editing a workflow for deals.
Define Deal Conditions
In the Conditions tab, create a condition to specify the criteria for deals.
Example: Filter deals based on activity values, deal stages, or other criteria.
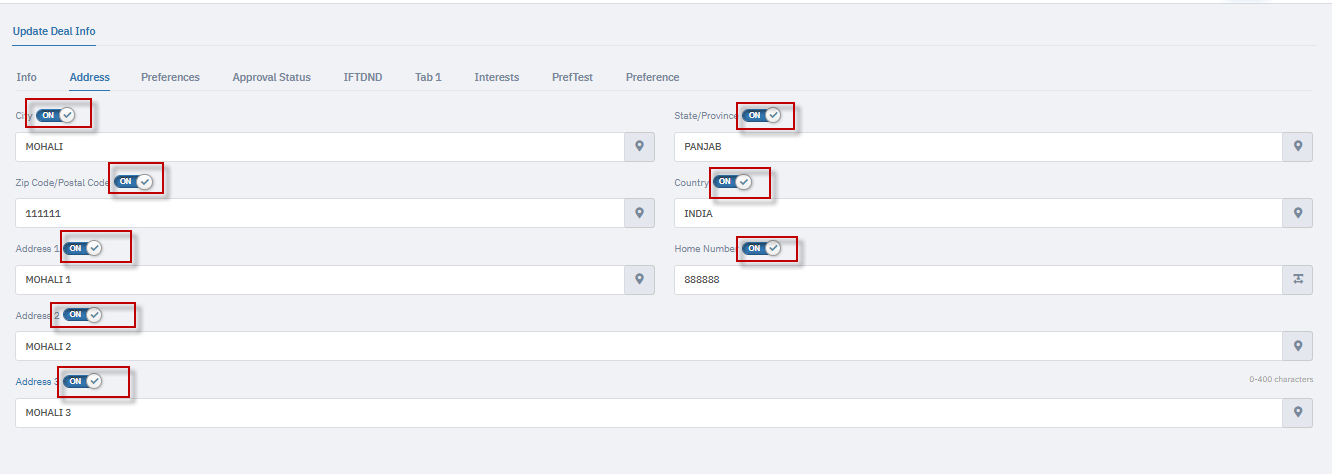
Enable Actions for Updating Deals
Go to the Action tab within the workflow.
Enable the fields you wish to update for deals that meet the conditions.
Specify the new values or changes to apply to each enabled field.
Example: Update fields like "State/Province," "Zip Code," or "Address" for registered deals.

Save and Activate the Workflow
After configuring the actions, save the workflow and activate it to start automating updates for the deal list.
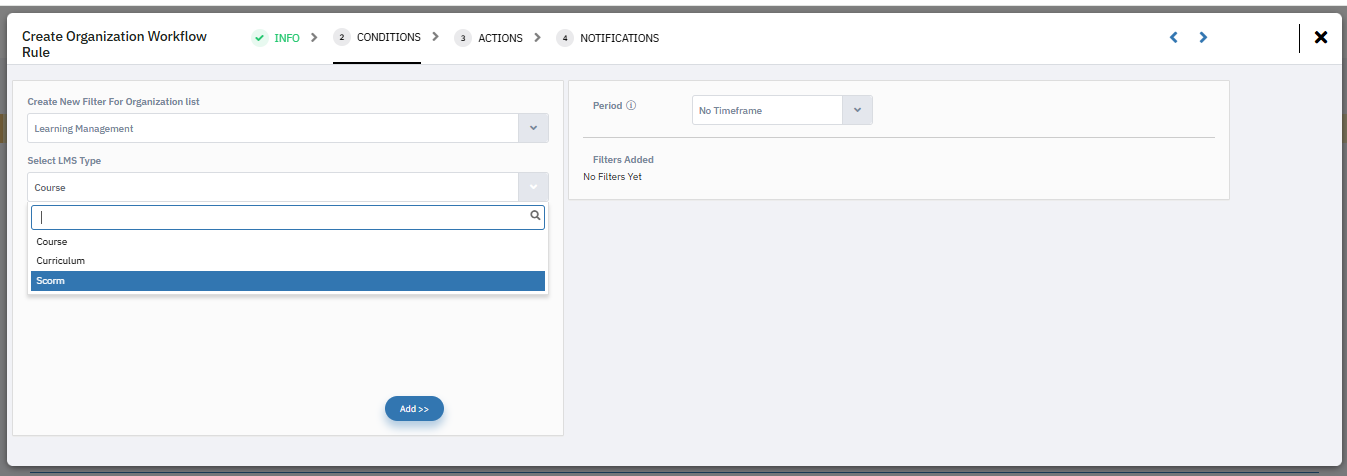
The Automation Manager now supports LMS-based conditions.
Enables automated actions based on user training progress.
Steps to Apply LMS Conditions in Automation Manager:
Navigate to Automation Manager.
Select Create New Automation or modify an existing one.
Add a condition node and select "LMS Completion Percentage.".
Define the completion criteria.
Save and activate the automation rule.
Key Takeaways
LMS tracking is now integrated into smart lists, scoring, drip campaigns, and automation.
Enables targeted engagement based on learning progress.
Provides better learning analytics and automation.
Improve efficiency by automating repetitive tasks.
Ensure consistency in deal data updates.
Streamline workflows for better deal management.
Use this functionality to maintain up-to-date and accurate deal records effortlessly.
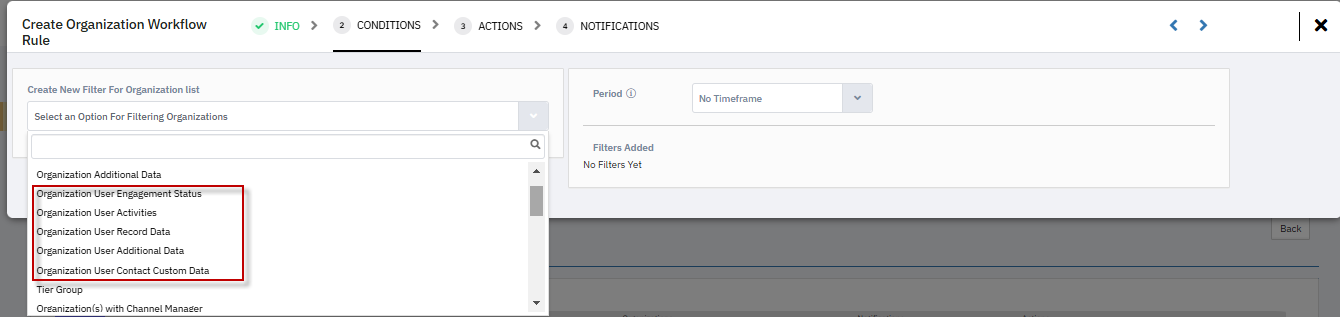
In the Organization Workflow, you can now use User Conditions to create workflows in the Automation Manager.
New Workflow Conditions in Automation Manager:
Organization User Engagement Status
Organization User Activities
Organization User Record Data
Organization User Additional Data
Organization User Contact Custom Data
Steps to Apply User-Based Conditions in Workflows:
Go to Automation Manager > Organization Workflow.
Select Create New Workflow or modify an existing one.
Add a condition node and choose one of the new user conditions.
Define the criteria for filtering users.
Save and activate the workflow.
These enhancements provide greater automation flexibility and help organizations drive engagement based on user-specific data.
Key Takeaways
Enhanced Organization List Segmentation: Users can now filter organizations based on user data.
Improved Workflow Automation: Allows for targeted automation based on user records and engagement.
Better User Tracking & Reporting: Helps organizations gain better insights into user behaviors.
Overview: How to Enable Email Notifications for Partner Admins in the Automation Manager
The Automation Manager now supports sending email notifications to Partner Admin users when creating or modifying User and Organization workflows.
Steps to Enable Email Notifications for Partner Admins
Create a Workflow in Automation Manager
Navigate to the Automation Manager module.
Set up a new workflow for Users or Organizations, as needed.


Add a Smart List Condition:
Define the conditions that will trigger notifications.
In the Notification step, check the Email box.
Choose Partner Admin from the recipient list.


When this setting is enabled, Partner Admins will automatically receive notifications whenever the workflow’s conditions are met, ensuring timely updates and smoother coordination.
Overview
You can now filter or trigger workflows in the Automation Manager based on the exact date a contact filled out a specific form.
Steps to Configure in Automation Manager
Open the Automation Manager
Go to Setup > Automation Manager.
Create a new workflow or edit an existing one.
Add a Condition Node
Insert a Condition Node in your workflow.
Select Specific Form Filled on Specific Date from the condition list.
Define the Form and Date
Choose the relevant form.
Specify the date criteria (e.g., “on,” “before,” “after”).
Save to finalize.
Benefits
Precise Workflow Triggering: Launch follow-up tasks, alerts, or emails exactly when a form is filled.
Better Timely Engagement: Ensure contacts receive automated responses or tasks immediately after a form submission.

This enhancement allows for more targeted automation, helping you engage contacts at the right time based on their activity.
New Action in User Automation: Add/Remove as Partner Admin
Overview
A new action—Add/Remove as Partner Admin—has been added to the User Automation module. This enables automatic assignment or revocation of Partner Admin roles based on specific workflow conditions.

Within Automation Manager, go to the Actions tab in a User workflow.
Select the new action: “Add/Remove as Partner Admin.”
Based on the logic defined under the Conditions tab:
The selected user will be automatically promoted to Partner Admin, or
The Partner Admin role will be revoked from them.


Streamlines role-based access management.
Reduces the need for manual administrative updates.
Ensures consistency across partner user roles using predefined criteria.
Onboarding Automation: Automatically assign Partner Admin rights to users who belong to specific organizations or meet defined onboarding milestones.
Role Maintenance: Revoke Partner Admin access when a user's role or status changes (e.g., marked inactive or reassigned).
Partner Tier Logic: Assign Partner Admin access only to users from certain partner tiers or incentive levels.
Conclusion
This enhancement simplifies administrative overhead by automating Partner Admin assignments. It ensures that role permissions stay aligned with real-time user status, reducing manual errors and improving governance across partner-facing operations.
Related Articles
How do I assign 'Channel Manager' to new users?
Step1: Login to Super Admin account and go to Setup > User Management > Organization Groups. Step2: Click on ' Create ' Button. Step3: Enter name of the group. Step4: Click on 'Add' button in front of the Organizations to them to the group. Step5: ...Upcoming terms of use updates, June 2025
In June of 2025, Mindmatrix is starting updates to the DPA (Terms of Use) for all clients in line with recent requirements from GDPR, CCPA, and other standard privacy policies. What will this mean for users? The next time your users login, they will ...How do I modify my terms of use (DPA) to include additional information?
Since Mindmatrix is GDPR and CCPA compliant, the terms of use in the product are required, and visible for every user who logs into the product to accept. This article will give you insight on your options as a client to enhance the existing terms of ...How do I complete a phased setup process and what should I expect?
We specialize in helping our clients achieve their goals by offering integrations for numerous CRMs and third party applications. Sometimes, we know this customization can take more time so we offer options for our clients to complete an accelerated ...How do I share Contact Lists with Partner Admins and Channel Managers?
The functionality to share contact lists with Partner Admins and Channel Managers has been introduced in Recipient Lists, Smart Lists, and Company Smart Lists. This allows for streamlined access management, ensuring that relevant contacts are shared ...