How do I create an Email Drip Campaign?
 Email Drip Campaigns are set-up to deliver pre-selected emails to select contacts on a continuous, pre-determined basis. Contacts added to email campaigns will always start from the first event.
To add Contacts and start Drips, go to the Manage tab, and then hit Campaigns. Drip template edits can be made here, as well, based on the permissions set in the Setup tab.

Template Set Up:
Click Create (or Edit, or Copy on an already created template)
Fill in the Name, Description and Filters for your new Email Drip Campaign template
Campaign Events
"Send" Events:
You can also begin with a Send Event which allows you to first start with an email. Select, Send and choose an email template and then click on Submit. The system will choose the template name as the send Event name, or you can type in a Send Event name. Clicking, “Allow the user to edit” will give the end-user ability to make edits to the email template in that Event.
"Condition" Events:

Overview
You can now use Specific Form Filled Date as a Condition Node in your drip campaigns, allowing targeted emails based on the exact date a contact submitted a form. This enhancement allows for more accurate and time-sensitive engagement through your drip workflows.
Steps to Implement in a Drip Campaign
Open or Create a Drip Flow
Navigate to the Drip Flow Builder in your system.
Create a new drip or edit an existing one.
Add or Edit a Condition Node
Insert a Condition Node where you want to filter contacts.
Select Specific Form Filled Date from the list of conditions.
Set the Form and Date Criteria
Choose the specific form you’re tracking.
Enter the relevant date range or specific date.
Save and connect the node to subsequent actions (e.g., sending an email).


Benefits
Time-Sensitive Targeting: Ensure contacts who filled a form on a particular date receive follow-up emails promptly.
Enhanced Personalization: Send customized drip campaigns or reminders based on recent form submissions.
Time-Sensitive Targeting: Ensure contacts who filled a form on a particular date receive follow-up emails promptly.
"Delay" Events:
After the first Event is established, you can add a Delay to put a set timeframe between Events. To add a Delay, select the clock icon that says, Delay. You will have the option to name your Delay Event, choose a relative or an absolute delay time. Click on Submit when you are finished.

Setting a "Relative" delay:
Setting an "Absolute" delay:
Next, name your Event, choose the tab that corresponds to your chosen action. Choose "Move to Program" to select a different Drip template, choose "Go to Event" to select an Event from the same template, “Update Contact Info” to update contact information, “Create Tasks” to create a task for a sales user, or “Remove Contacts” to remove a contact from the Drip.
Make sure to hit Save at the top of the screen while you are creating your Drip campaign template to save any work.
As a best practice, you should test your Drip campaign to make sure it is working properly. To test your Drip campaign, click on the Test icon.
Continue to click the Proceed to Next Item link until you have completed the Drip campaign
Once you finish testing the Drip campaign template, you can click Done at the top of the page.
The last step is to set your Sharing permissions. You can choose specific permission levels for each User in your company, as well as if you would like them to be able to copy the Drip template or if you want it shared with them. Once this is completed, you can hit Finish to save the Email Drip Campaign template.
There are tons of different ways to build each Email Drip template. Important things to consider when creating an Email Drip Campaign are:
1. Are your email templates completed? You cannot build your Drip campaign without your send Events created. You may edit the templates after the Drips are created, but you need to have the templates created to choose them in the template builder.
2. Set Event permissions. These templates can be used by any marketing and sales employee. Set permissions on editing each Event within the Event selector.
3. Create your basic Email Drip Campaign templates in the Setup tab.
4. The layout of the Drip cannot be edited once the program is running.
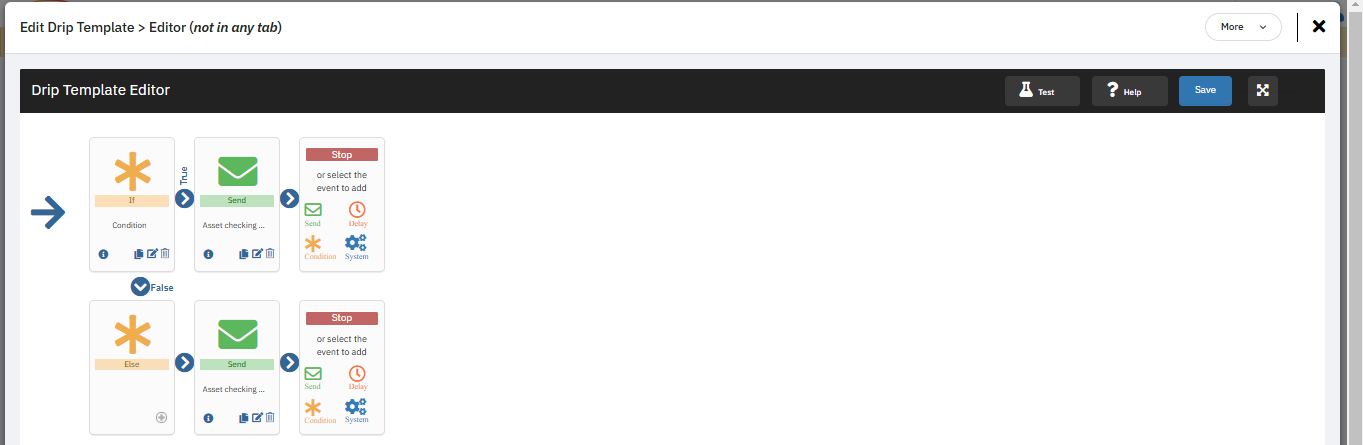
A new filtering condition has been introduced in the email drip campaigns module, allowing users to exclude contacts based on their Sales Playbook tab status. This ensures better targeting and prevents sending irrelevant emails to contacts who are not yet engaged or who have already moved beyond a specific playbook step.
How It Works
The ‘Not In’ condition offers two options when setting up a drip campaign:
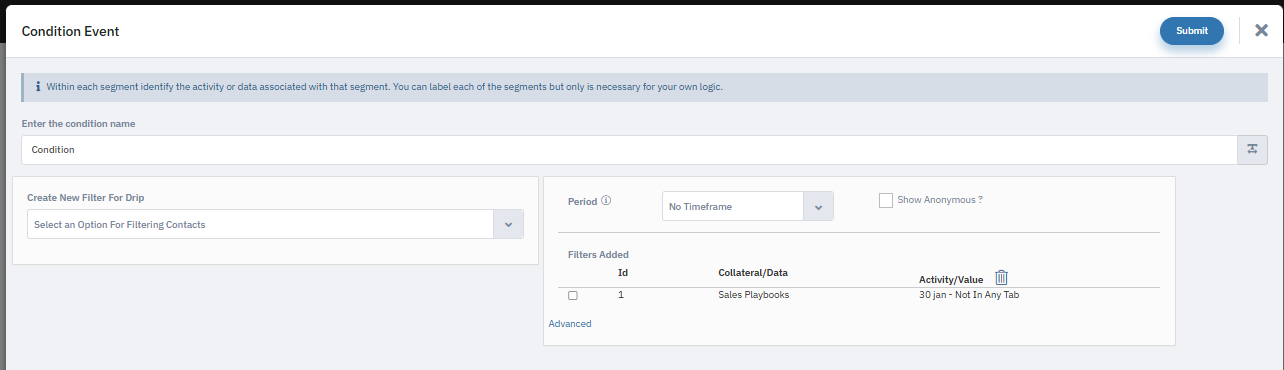
Not In Any Tab – The campaign will only send emails to contacts who are not assigned to any tab or step in the playbook.
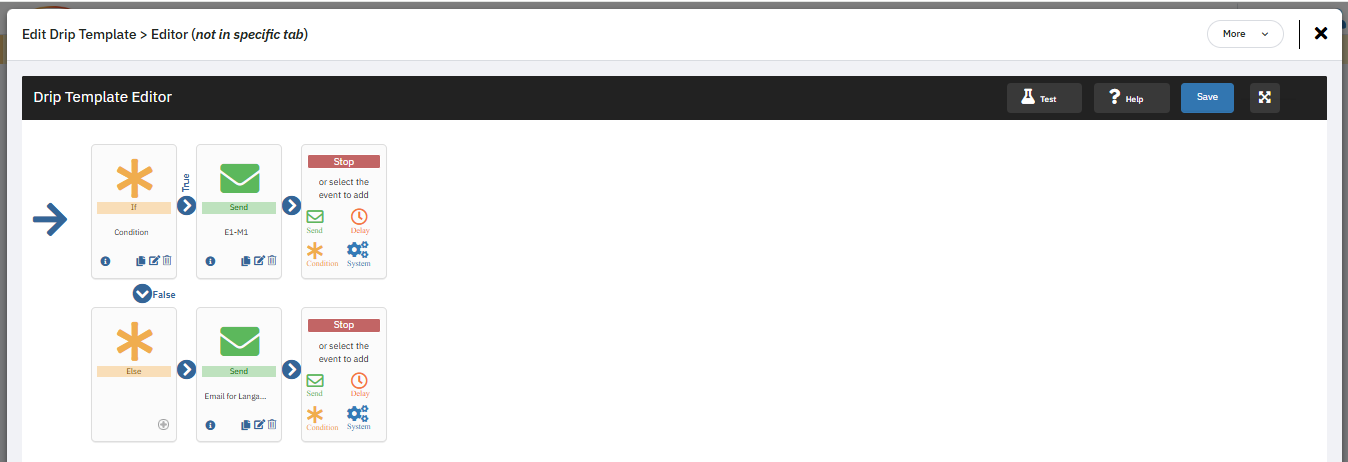
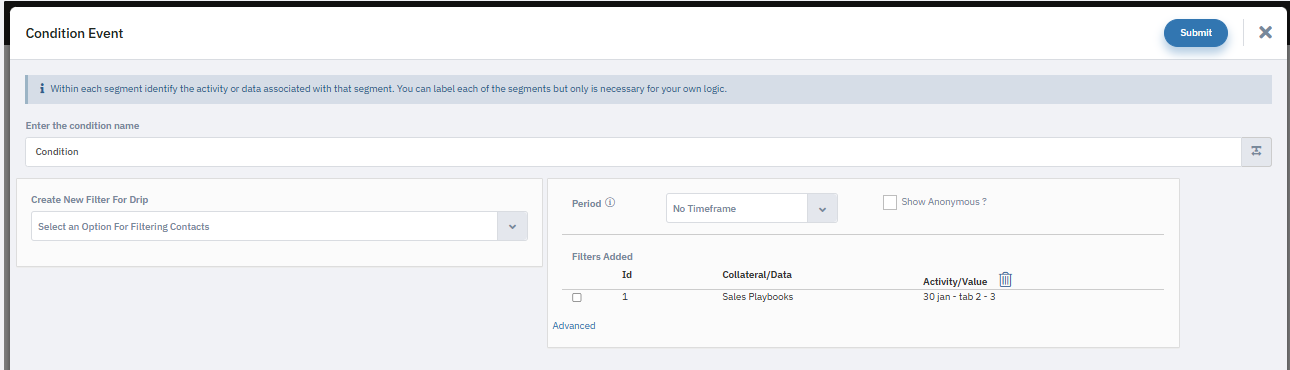
Not In The Specific Tab – The campaign will exclude contacts from a selected tab or step while continuing to engage those in other tabs of the playbook.
By applying this condition at the start of your email drip sequence, you ensure that communications are precisely tailored to the correct audience, preventing irrelevant outreach and improving engagement.
- A sales team wants to send follow-up emails only to contacts who have not yet reached a demo stage (which is a tab in their playbook). By applying the Not In The Specific Tab condition, the system ensures that only early-stage leads
receive the email sequence. - Similarly, if a campaign is designed for cold leads, the Not In Any Tab condition can ensure that only unengaged contacts are included in the campaign, avoiding unnecessary outreach to active prospects.
Steps to Apply the Condition in Drip Campaigns
Navigate to Drip Campaigns in the marketing automation module.
Select Create a New Email Drip Campaign or edit an existing campaign.
In the Condition Node, choose the new ‘Not In’ condition.
Select either ‘Not In Any Tab’ or ‘Not In The Specific Tab’, based on your requirement.
Define the drip sequence and save the campaign.
By implementing this filtering mechanism, email automation becomes more efficient and targeted, improving conversion rates and reducing unnecessary email traffic.
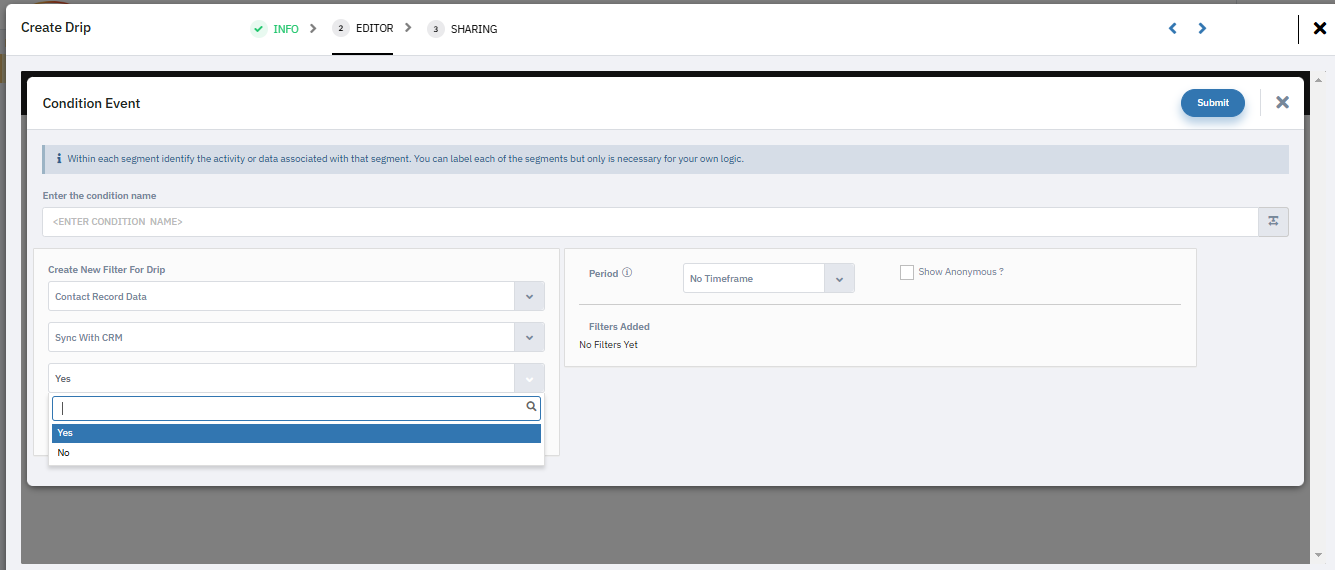
Applying CRM Sync Status in Email Drip Campaigns
The Sync with CRM condition can now be applied in email drip campaigns to ensure that emails are only sent to contacts with the desired CRM sync status.
This feature enhances email automation efficiency by targeting the correct audience.
Steps to Apply CRM Sync Status in Drip Campaigns:
Go to Drip Campaigns.
Select Create New Campaign or edit an existing one.
Add a condition node and choose "Sync with CRM.".
Select Yes or No to filter contacts accordingly.
Save and launch the campaign.
Related Articles
How do I edit the email templates in an Email Drip Campaign?
Along with editing and creating email campaigns individually, by template you can also edit the email templates already in a drip from the Email Drip Campaign editor. This helps streamline your edits so you're not switching back-and-forth between ...How should I submit a ticket for creating an email drip campaign?
Scroll to the end to the end of this article to copy the steps into a Word Document. Posted by The Team at Mindmatrix on 19 April 2018 05:49 PM Key items to confirm before setting up a drip campaign: What kind of asset is being created? Email ...How do I change delays in an email drip campaign?
For information on creating email drip campaigns, see: How to create an Email Drip Campaign template For more information on scheduling and running drip campaigns, see: How to Run, Stop, and Schedule an Email Drip Campaign Accessing the "Quick ...How do I create tasks from a system event in a drip campaign?
Who would use this? Users responsible for contact management and structuring marketing drip campaigns - Usually a Marketing Manager or Marketing Coordinator. For information on how to access and use the drip template editor, see How to Create a ...How do I Create a Social Media Drip Campaign Template?
Social Media Drip Campaigns are a series of social posts that can be run, scheduled, or stopped. These campaigns are designed as a triggered sequence of automated posts sent on a predefined schedule. [Learn more about creating one here: How to Run, ...