How do I activate ConnectWise in Mindmatrix?

How do I activate ConnectWise in Mindmatrix?

Posted by The Team at Mindmatrix on 13 November 2015 04:16 PM
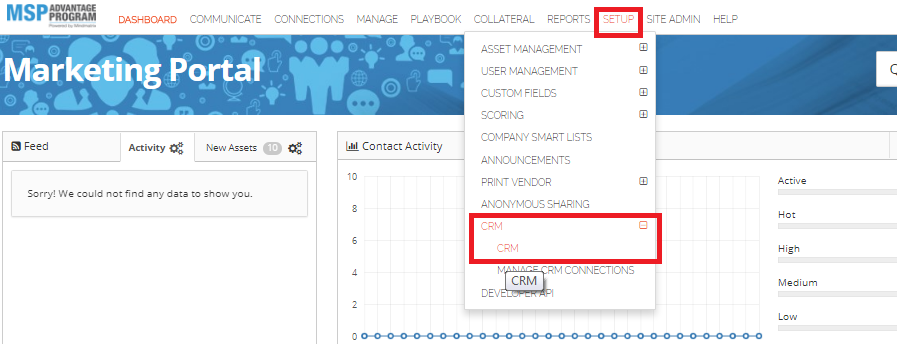
  • Now login to your AMP account & Go to> CRM > CRM.

click on your user profile.png

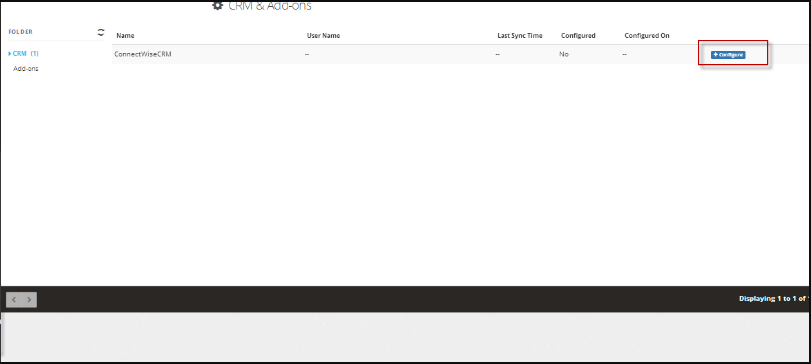
  • Click on the  “Configure Button” icon in Mindmatrix.

click on the CRM icon in Mindmatrix.png


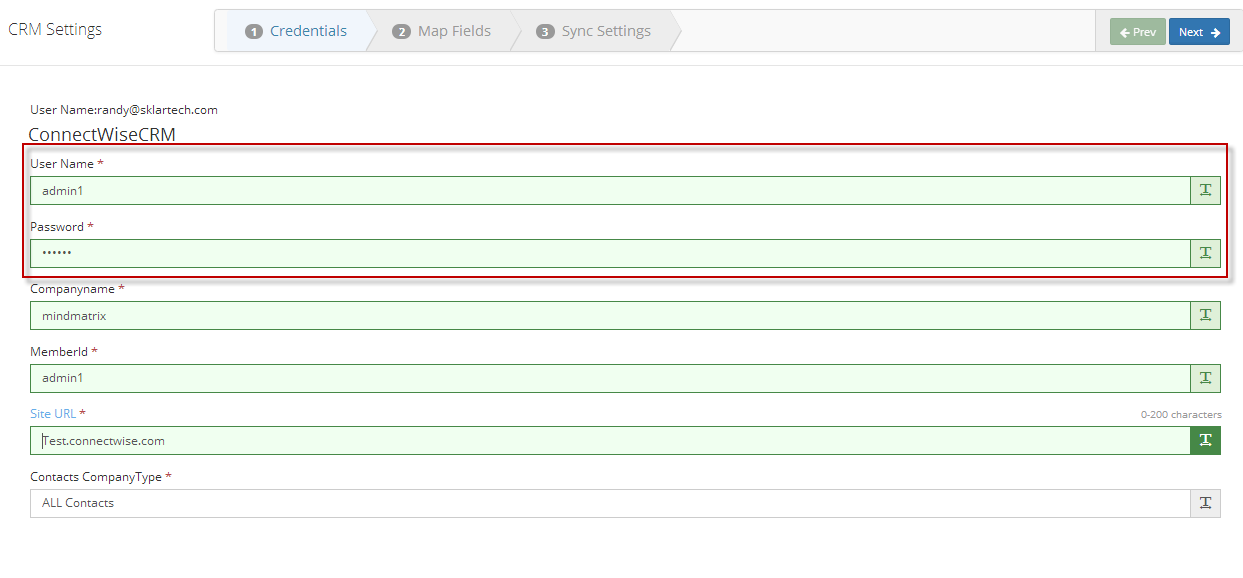
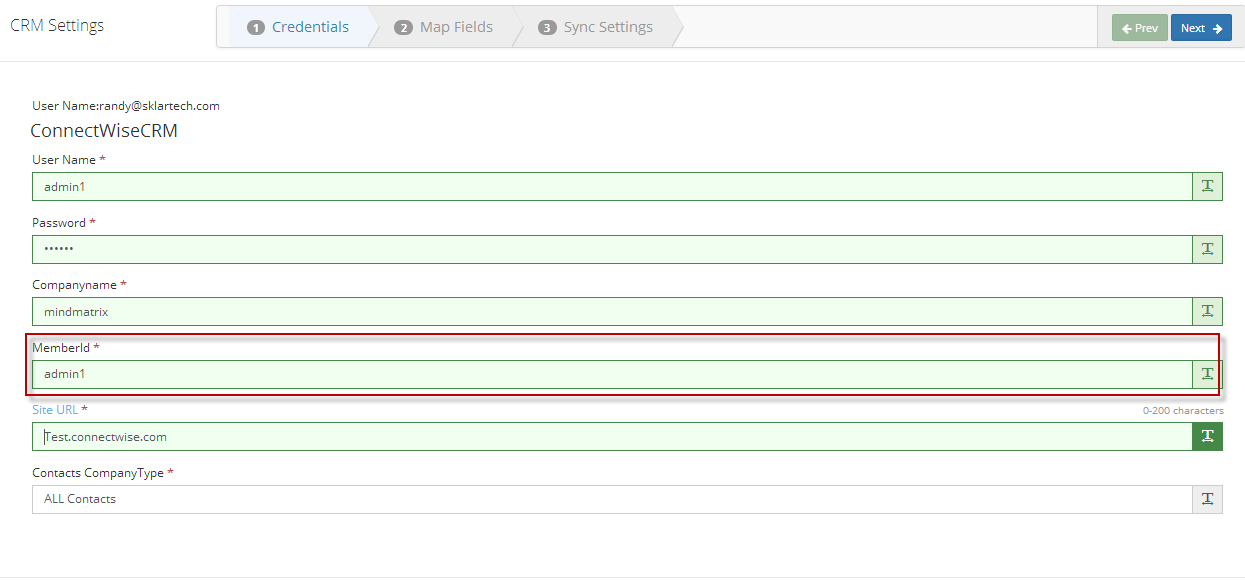
  • Enter your ConnectWise CRM integrator login credentials.

NOTE: You can create only a single ConnectWise integrator ID per company. Every user of that company can use the same integrator ID to login with AMP.


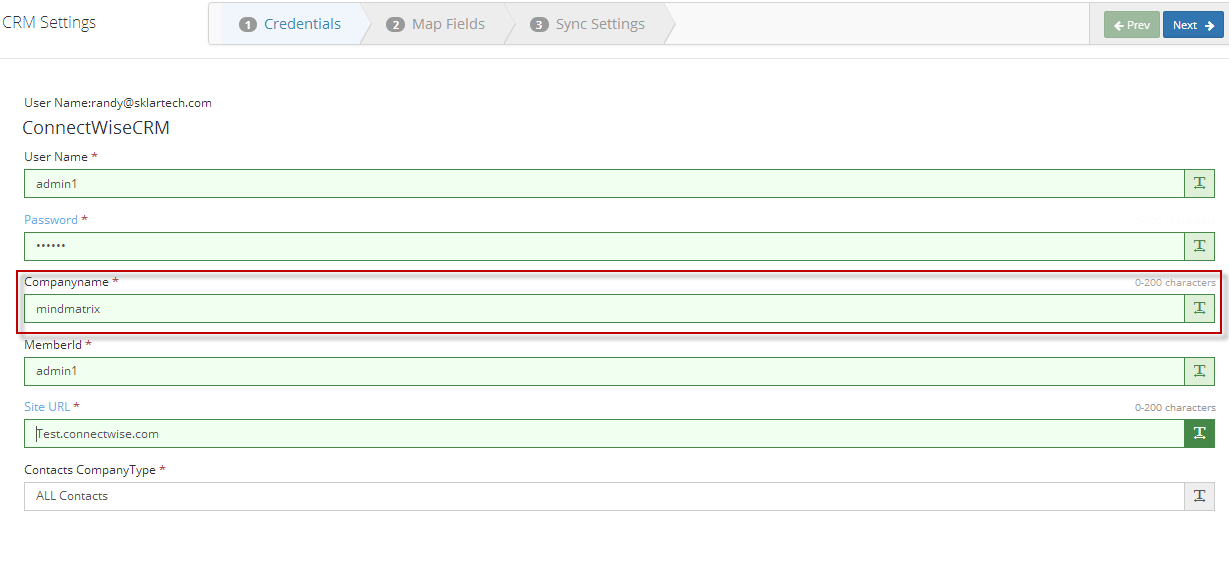
  • Enter your company name that is registered with ConnectWise.

  • In the MemberID field, enter the username that allows you to login to your ConnectWise account.

NOTE: The Member ID is the username you use to login to your ConnectWise account. Each user of your company can have their own unique Member ID, but the same integrator login details.


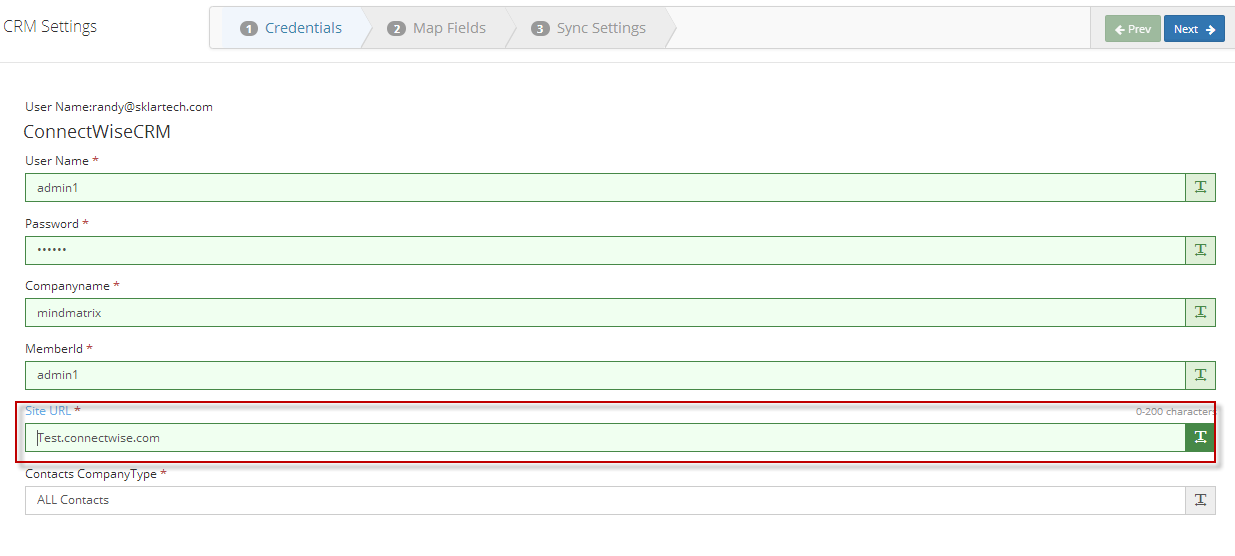
  • In the Site URL field, enter your ConnectWise login URL (please do not include http:// in the URL).

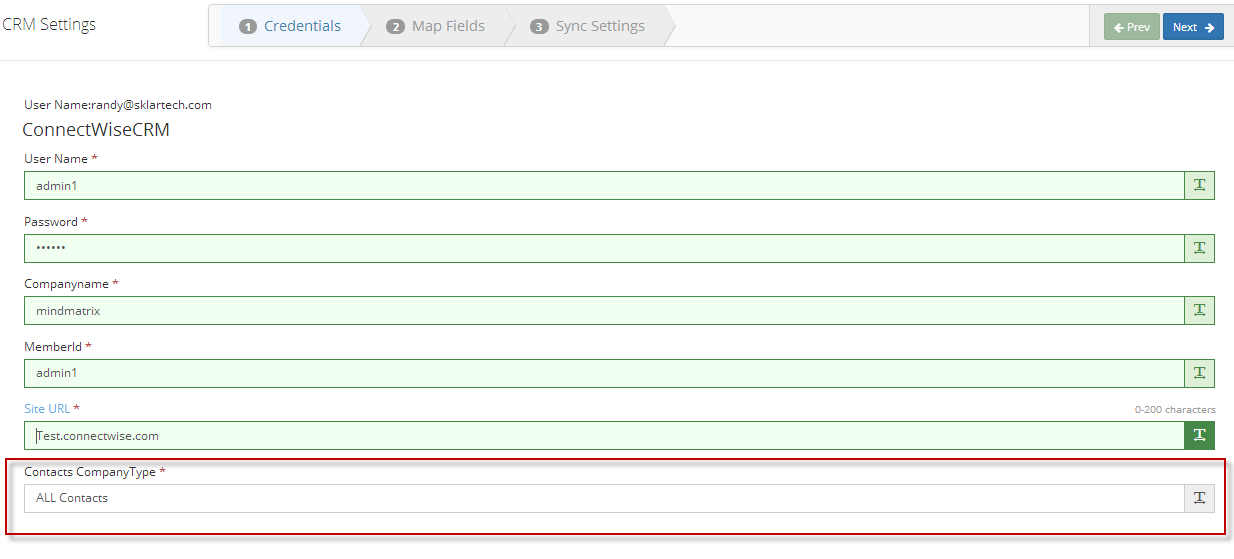
  • In the ‘Contacts Company Type’ field, enter specific account type contacts that you want to import from ConnectWise CRM.

  • For e.g. define this field as ‘ALL contacts’. Import session will include all contacts from CRM, irrespective of its account type.

  • In your ConnectWise company profile, the dropdown ‘type’, displays static contact company types (competition, customer, not-a-fit, owner, partner, prospect, suspect, unknown, and vendor).

  • These options define company type of the contact.

NOTE: You can add custom contact company type in your ConnectWise account.

  • To add a custom contact company type, click ‘Setup Tables'


  • Enter ‘Company Type’ in the ‘Table’ field, and click ‘Search’.


  • Select ‘Company Type’.

  • Click the ‘Add New Item’ icon.

  • Enter the contact company type in the ‘Description’ field. For e.g. Newly Acquired.

  • Click the ‘Save’ icon.


  • The added contact company type will be updated successfully.

  • You can view the added contact company type in the ‘type’ field of a company.

  • To import all your ConnectWise account contacts, type ‘All contacts’ in the ‘contacts company type’ field.

  • To import specific contact company type, separate each contact company type by comma in the ‘Contacts Company Type’ field.

  • For e.g. if you wish to import ConnectWise contacts with company types as customer, prospect, and owner then insert a comma between each option in this field.

  • Click ‘submit’.

  • If you wish to change the selected sync time interval, you can pick desired ‘sync time’ interval from the dropdown.

  • Click ‘Update’.

-AMP is now integrated with your ConnectWise account.

    • Related Articles

    • CRM TODO / activity Connectwise

      This article will covers how todo activities are generated for Connectwise.  ToDo activities for Connectwise can be generated under Contacts or Opportunities.  Posted by The Team at Mindmatrix on 14 August 2018 04:34 PM Within Mindmatrix contact todo ...
    • How to activate Mindmatrix POD Integration with Connectwise?

      1. Login to Connectwise as an administrator. 2. Visit System > Setup Tables > table column > search "manage" 3. Click add new item 4. Enter POD information:  Enter Description as "AMP Feed" this will be the display name of the POD. Select Screen it ...
    • How do I integrate Mindmatrix with Connectwise?

      Posted by The Team at Mindmatrix on 07 March 2014 05:25 AM     Create a Connectwise API Member   Create a new ConnectWise API Member to authenticate with AMP.  Creating a Member In your ConnectWise account, navigate to System > Members, then click ...
    • How to get started with CRM TODO / activity in Connectwise

      Posted by The Team at Mindmatrix on 14 August 2018 04:34 PM Reference this article to get started with ToDo notifications from ...
    • How to create custom menus in Connectwise CRM

      Posted by The Team at Mindmatrix on 17 November 2015 09:05 AM Steps to create custom menus in Connectwise CRM: Step 1: From within the ConnectWise client navigate to System -> Setup Tables -> Search "Custom" and search. Step 2: Click on the table ...