What are the different Role abilities in Mindmatrix?


- Not Set: The minimum level, this media type and section will not be shown for the User
- View: A User can only view this type of media, but not edit or beyond
- Edit: For this specific media type, a User can view and edit the master (original) file
- Create: Allows the User to view, edit the master, or original file, and create this particular media type
- Delete: The highest level, a User can view, edit the master, or original file, create this particular media type, and delete the master, or original file for this media type
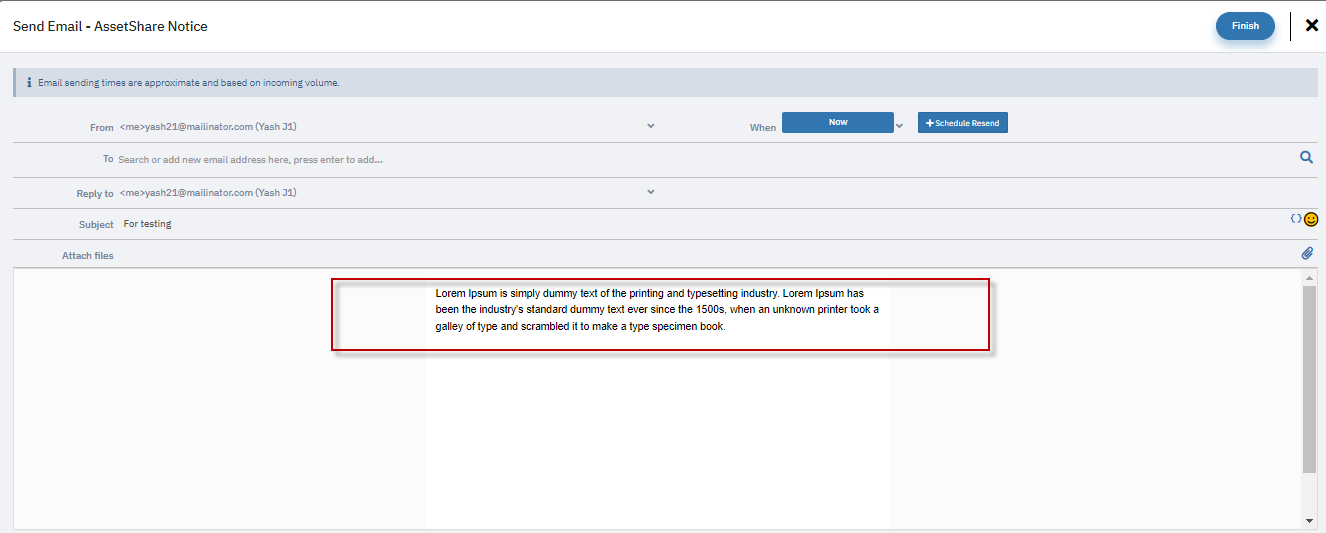
- Send: Enables “Send” option for assets
- Publish: Provide publishing privileges for an the asset to social sites from within the portal
- Share: Gives permission for User to share the media created to other Users
- Copy: Allows a User to copy an Asset. (Note: This can be used in place of Edit and Create in order to give the change for a User to make a local copy they can freely edit without changing the master file for all Users)
The System Tab - Role Definitions
- Not Set: This is the minimal value for slider and it means there is no permission provided for this setup item. The sub-menu will be hidden when set at this level.
- View: This is first level of permission. User can only view in the grid the already created records for the company.
- Edit: When set at this level, User can only edit existing records of the grid.
- Create: When set at this level, User can create new records as well as edit the created ones.
- Delete: This is the highest level and ser can all actions including deleting records.
The Features Tab - Role Definitions
- Drip: Gives permission for a User to see and use Drip Campaigns in Manage > Campaigns
- Auto Publishing: Gives permission to enable Social Drip and Social Listening in Manage > Campaigns
- Setup Menu: Displays the “Setup” tab menu when enabled. (If this is disabled then it will hide the complete “Setup” menu even if there exist permission for items within the men.)
- Developer API: Provides developer API. Meant for use within Mindmatrix set-up, or to use with help from your Mindmatrix team
- Self Serve: Turns on the self-serve Welcome screen for new Users
- Push to CRM: Enables option under certain functions within the portal to have a "Push to CRM" checkbox
- Filter Category: Allows User to manage Filters, Categories for Filters and tags
- MDF Planner: Turns on MDF (Market Development Funds) for Users to request and view
- Summary Reports: Shows reports within a Portal
- Persona: Helps to distinguish the proper representation of the goals and behavior meant for a Role's Dashboard view
- Dashboard: Selects view for Dashboard
- Dashboard Subcategory: If available, gives ability to select a subcategory for that Persona view for Dashboard
- Notifications: Enables the ability to have Users turn on Notifications via email from the portal
- Contact Sharing: Gives the ability to enable sharing Contacts with other Users and/or User groups via Smart Lists
- Template Approval: Enables the “Template for Approvals” sub-menu in Setup > Asset Management
- CRM Add-ons: Shows “CRMs & Add Ons” menu under the Setup tab
- Export: Allows Users to export certain reports, and contact databases into CSV and PDF
- Opportunity Ownership: Turns on the ability for a User to be able to 'own' an Opportunity
- Import Sales Data:
- MDF Approver: Enabled ability to approve MDF (Market Development Funds) from Users
- Restrict Document Upload: Disables the ability for a User to upload their own Assets and Documents
Steps to Enable the Skip Editor Setting
Navigate to the Roles Section:
Go to the Roles section under the settings menu.
Find the relevant role for which you want to enable this setting.
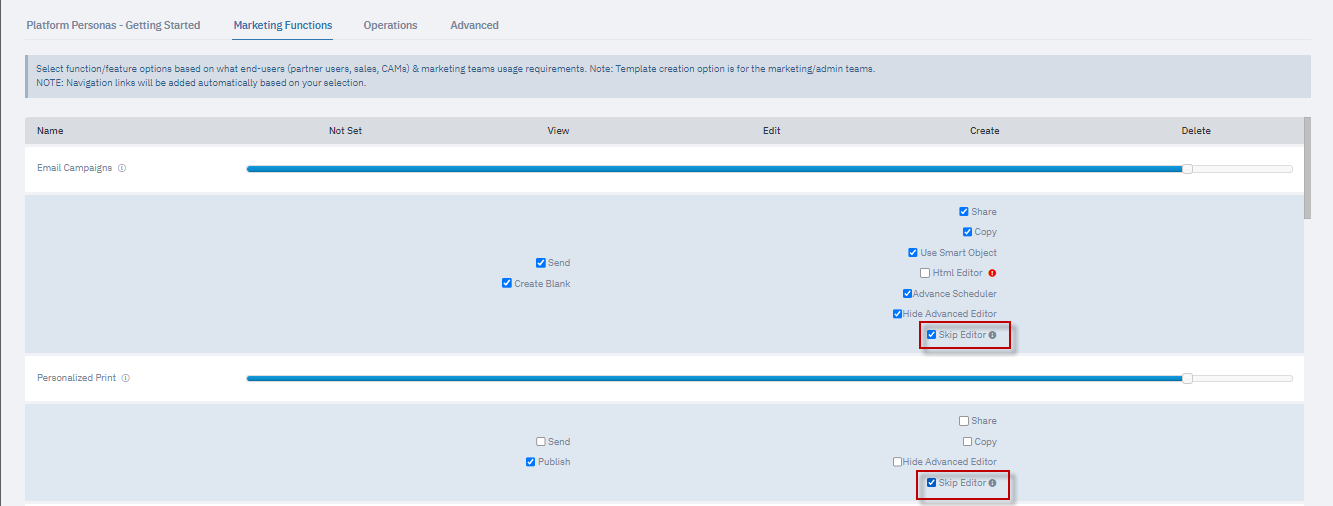
Activate the Skip Editor Checkbox:
Scroll down to the section where you configure permissions for Email and Print Assets.
Enable the Skip Editor checkbox for both Email Send and Print Assets.
How It Works: Once the Skip Editor option is enabled:
Users will no longer be able to modify the content of the email or print template directly in the editor before sending it.
This ensures that predefined templates remain consistent and are sent out as intended without changes.
Update to the Training Module: Print Media Permissions
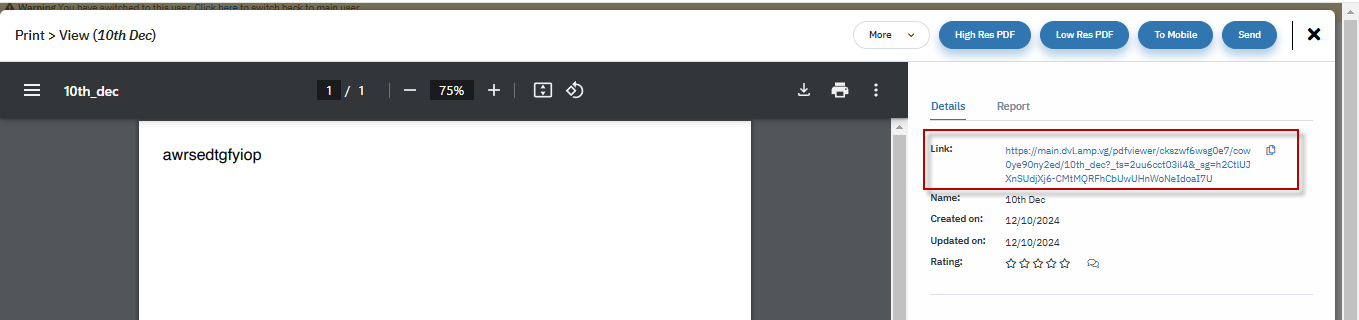
There’s an update to the Print Permission section under the Roles module. This update introduces a checkbox labeled ‘Hide Display URL’ in the Print Media settings.
How It Works:
When the ‘Hide Display URL’ checkbox is enabled, the display URL in the print template will no longer be visible.
To verify this:
Navigate to the following URL: #collateral/pdf.
Open the media section of the print template.
Observe that the display URL is hidden (refer to the screenshot below).
Clicking on any print template will no longer reveal the display URL.

Related Articles
How do I share a single asset template with Users, Groups, and/or Organizations?
Posted by The Team at Mindmatrix on 27 July 2015 07:07 AM To share a template with users, groups, or companies, first click on Setup > Asset Management > Templates. To choose the template you would like to share, and then click on the template. You ...How do I share or unshare Contacts with Users or Groups?
Contacts can be shared between Users in several ways. You can manually share contacts using the below directions, or using Contact Lists. Learn more about sharing groups of contacts automatically by using Smart Lists here: How can I share Contacts ...How do I set up a Role and assign it to a User or User Group? (Channel/Enterprise)
It is possible to personalize navigation menus within Mindmatrix software. If you are unable to navigate to the correct page, contact your platform administrator. Roles will allow you to assign software level permissions to Users. When you assign ...How do I Import Users?
Note: Only administrators have access to this feature. Please contact your administrator or reach out to support@mindmatrix.net for assistance. 1) Go to Setup > User Management > Import Users: (Note: If your top navigation menu is customized, ...How do I create a User Group
Why Create User Groups? Creating a “Group” will allow you to easily organize your Users to share assets or assign system level permissions in Mindmatrix. Groups will let you share assets with large numbers of Users simultaneously. For example, if you ...